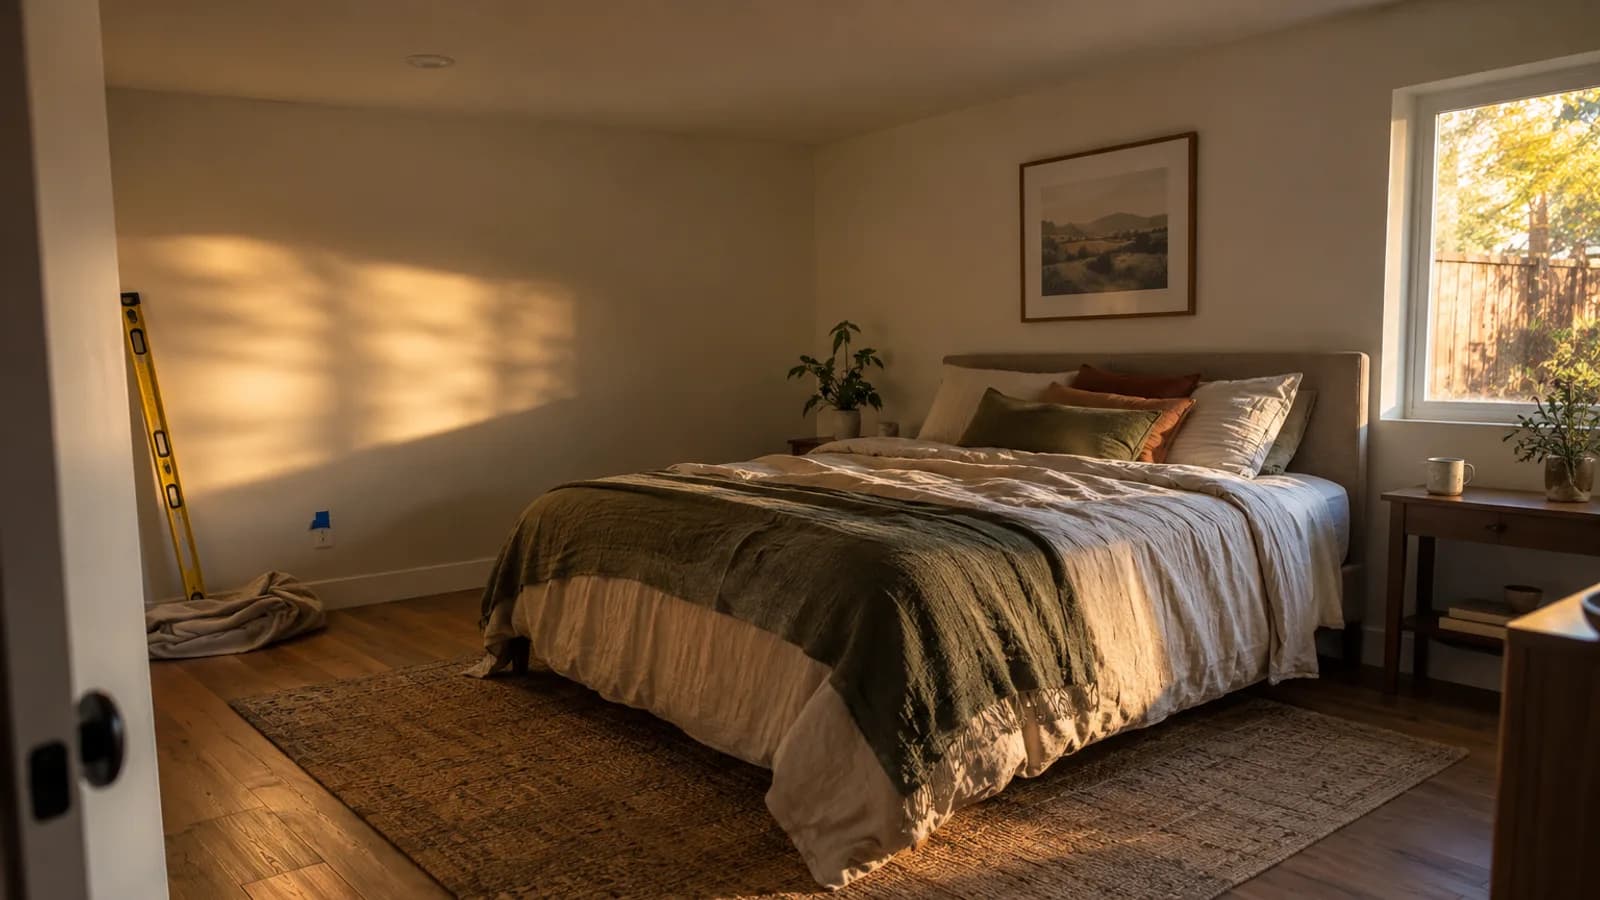
Turning a garage into a bedroom in California can cost anywhere from $80,000 to over $250,000. That's a wide swing. The final number depends on the condition of your garage, the finishes you choose, and where you live in the state. A simple conversion in a newer home with a good foundation can start lower, especially if you’re not adding a bathroom and the existing slab is sound. But for most projects, particularly in older homes, you're looking at a full-scope renovation that requires bringing a non-habitable space up to modern building codes for living.
In a Nutshell
- Typical Cost Range: $110,000 to $195,000 for a full garage conversion to a bedroom in major California metro areas.
- Timeline: Expect 4 to 7 months from initial design to final inspection. Permitting alone can take 2 to 4 months in some cities.
- Key Requirement: The project must convert an unconditioned space into a legal, habitable bedroom, meeting all California Building Code requirements for egress, insulation, ventilation, and structural integrity.
- Biggest Hurdle: Addressing the foundation. A garage slab was built to park a car, not to serve as the foundation for a conditioned living space. It often needs to be raised, sealed, and insulated.
- Top Benefit: Adds valuable, permitted square footage to your home, which can significantly increase its resale value, often providing a strong return on investment.
Why a Garage Conversion is More Than Just Drywall and Paint
Many homeowners see an empty garage and think it's a simple job: frame some walls, hang drywall, and lay down a floor. That's a critical misunderstanding of the scope. A garage conversion into a bedroom isn't a cosmetic update. It's a change of use, and that legal distinction is everything to your local building department. You are transforming a utility space, designed for cars and storage, into a habitable dwelling unit. This triggers a cascade of code requirements that don't apply to a simple remodel. The goal is to make the new room indistinguishable from any other bedroom in your house in terms of safety, comfort, and legality.
The benefits are clear. You add a bedroom without altering your home's original footprint, which is often faster and less expensive than a ground-up addition. In a state with high property values, adding permitted square footage is one of the most reliable ways to build equity. On the other hand, the primary drawback is the loss of covered parking and storage. California state law has eased requirements for replacement parking, especially for ADUs, but you still need to consider the practical impact. The other challenge is the sheer complexity. You're dealing with structural changes, new utility runs, and rigorous energy efficiency standards under Title 24. It's a job that demands a professional crew that understands the inspection process. A poorly executed conversion is just an illegal room that you'll have to tear out before you can sell the house.
The True Cost of a Garage Conversion to a Bedroom in California
A full garage conversion to a bedroom in California typically costs between $200 and $400 per square foot. For a standard two-car garage of 400 square feet, this puts the all-in price tag between $80,000 and $160,000. This range can shift significantly based on your location. A project in Los Angeles or the Bay Area will be at the higher end of that spectrum, while the same scope in Sacramento or the Central Valley might be 15 to 20 percent less expensive. The reason for the regional price difference is labor. The California Department of Industrial Relations prevailing wage data for Los Angeles County shows higher hourly rates for carpenters, electricians, and plumbers than in Fresno County, and your project's budget will reflect that.
Here’s a general breakdown of where the money goes on a mid-range, 400-square-foot conversion:
| Cost Component | Typical Cost Range | Percentage of Budget |
|---|---|---|
| Architecture & Engineering Plans | $8,000 - $15,000 | 7% - 10% |
| Permits & Fees | $4,000 - $9,000 | 3% - 6% |
| Foundation & Concrete Work | $10,000 - $25,000 | 8% - 15% |
| Framing & Structural Changes | $15,000 - $30,000 | 12% - 18% |
| Exterior Finishes (Siding, Windows, Door) | $12,000 - $22,000 | 10% - 14% |
| Plumbing & Electrical | $15,000 - $28,000 | 12% - 17% |
| HVAC System (Mini-Split) | $5,000 - $9,000 | 4% - 6% |
| Insulation & Drywall | $8,000 - $14,000 | 7% - 9% |
| Interior Finishes (Flooring, Paint, Trim) | $10,000 - $20,000 | 8% - 12% |
| Labor & Contractor Overhead | (Included in above line items) | (35% - 45% of total) |
Remember to budget for the unexpected. The National Association of Home Builders recommends a ten to fifteen percent contingency on renovations in homes over thirty years old. For a $130,000 project, that's an extra $13,000 to $19,500 set aside for surprises like discovering the original garage was built on an unpermitted slab or finding knob-and-tube remnants in the wall you need to tie into.
What Drives Your Garage Conversion Budget?
Several key factors determine whether your project lands at the low or high end of the cost spectrum. The single biggest variable is the condition of the existing structure. A garage built in the 1990s on a properly engineered slab is a much simpler starting point than one from the 1950s with a cracked, unreinforced foundation. If your contractor has to pour a new slab or extensively repair the existing one, it adds significant cost and time.
The second major driver is the scope, specifically whether you include a bathroom. Adding plumbing for a bathroom requires cutting into the concrete slab to run new drain lines, which is a major undertaking. This can easily add $20,000 to $35,000 to the project. The level of finishes also plays a huge role. Basic vinyl plank flooring, stock windows, and builder-grade paint are far more economical than custom millwork, high-end tiling, and premium light fixtures. Finally, structural requirements dictated by your local jurisdiction can impact the budget. If you're in a high-risk seismic zone, you may need to add new shear walls or foundation bolting, which requires an engineer's sign-off and adds to the framing costs. You can learn more about how these factors add up by reading our complete guide to the cost of a garage conversion in California.
Three Representative Projects from 2026
Three representative projects from 2026, scoped similarly, reconstructed from Renology's Project of the Day network and used here in aggregate form:
- Basic Bedroom Conversion ($95,000): A 1980s 400 sq. ft. garage in a Sacramento suburb. The existing slab was in good condition and only required sealing and leveling. The project involved framing the garage door opening, adding one egress window, a closet, insulation, drywall, a ductless mini-split for HVAC, and basic electrical. Finishes were builder-grade, with LVP flooring and standard lighting. No plumbing was added.
- Mid-Range Bedroom with Bathroom ($165,000): A 1960s 450 sq. ft. garage in the Echo Park neighborhood of Los Angeles. This project required significant slab work, including cutting trenches for new plumbing to add a full bathroom. It included two new windows, upgraded insulation to meet Title 24 requirements, new siding to match the main house, and mid-range finishes like engineered hardwood floors and semi-custom cabinetry in the bathroom.
- Premium ADU Conversion ($240,000): A 500 sq. ft. detached garage in the Rockridge area of Oakland, converted into a full studio Accessory Dwelling Unit (ADU). This involved a complete structural rebuild, including a new foundation and seismic retrofitting. The scope included a full kitchen with quartz countertops, a high-end bathroom with custom tile, vaulted ceilings, and large bifold doors opening to the yard. The project also required a new electrical subpanel and sewer line connection.
Costs are for a 400-500 sq. ft. garage and vary by location and scope. Based on 2026 project data.
How to Convert Your Garage into a Bedroom: A Step-by-Step Guide
3 pros, editor-screened. 4 questions.
See my 3 matchesA garage conversion to a bedroom is a complex job with a strict sequence of operations. Getting it right means following the process, passing inspections at each stage, and not cutting corners. Here is the field-tested order of operations.
Step 1: Feasibility and Design
Before you do anything, you need to know if the project is even possible. Hire a qualified designer or design-build contractor to assess your garage. They'll check the foundation, framing, and setbacks to see what you're working with. This is where you develop the floor plan and decide on the scope. Will it be just a bedroom, or will you add a bathroom? How will it connect to the main house?
Why: A proper assessment upfront prevents you from spending thousands on plans for a project that the city will never approve or that is structurally unsound.
Watch out for: Ignoring local zoning rules. Your city may have specific requirements for setbacks or on-site parking that could kill the project before it starts.
Step 2: Create Plans and Hire Your Team
With a design concept in hand, you'll need a full set of architectural and structural plans. These are the blueprints the city will review and your contractor will build from. They need to be detailed, showing everything from the size of the foundation footings to the type of insulation in the walls. While the plans are being drafted, you should be interviewing and vetting general contractors. Get at least three bids.
Why: Detailed plans are non-negotiable for pulling a permit. They are the official record of what you are legally allowed to build.
Watch out for: Hiring a contractor who wants to work without a permit. It's a massive red flag that exposes you to huge liability and can make it impossible to sell your home later.
Step 3: Submit for Permits
Your architect or contractor will submit the completed plans to your local city or county building department (like LADBS in Los Angeles or the San Diego Development Services Department). A plan checker will review them to ensure they comply with the California Building Code and local ordinances. This process can take anywhere from a few weeks to several months, depending on how busy your city is. Thanks to state laws like AB 970, many jurisdictions now have a 60-day shot clock to provide comments, which has helped speed things up.
Why: A building permit is your legal permission to start construction. Building without one can result in fines, stop-work orders, and being forced to tear out completed work.
Watch out for: Plan check corrections. It's very common for the city to return plans with a list of required changes. A good designer anticipates these and responds quickly.
Step 4: Demolition and Foundation Work
Once you have the permit in hand, work can begin. The first step is to clear out the garage and demolish anything that's being replaced, like the old garage door. Then comes the most critical and often most expensive part: the foundation. The existing slab will be inspected. If it's cracked, too thin, or lacks a vapor barrier, it will need to be repaired or replaced. Most often, you'll need to at least cut into the slab for plumbing and electrical conduits and pour a new topping slab with insulation and a moisture barrier to bring the floor height up.
Why: The foundation is the literal base for the entire project. If it's not level, insulated, and waterproof, the room will be cold, damp, and fail inspection.

Watch out for: Unforeseen slab conditions. You never really know what you have until you open it up, which is why a healthy contingency fund is essential.
Step 5: Framing and Structural Changes
With a solid foundation in place, the crew will frame the new walls. This includes infilling the large opening where the garage door used to be. This new wall is critical; it often needs to be engineered as a shear wall to provide seismic stability for the structure. They will also frame any new interior walls, closets, and window and door openings. If the existing ceiling joists aren't strong enough to support a finished ceiling, they will be reinforced at this stage.
Why: The framing creates the skeleton of the new room and must establish a continuous load path from the roof down to the foundation to be structurally sound.
Watch out for: The garage door header. Simply framing a wall under the existing header is not enough. That entire opening needs to be structurally redesigned to handle wind and seismic loads.
Step 6: Rough-In Utilities (MEP)
MEP stands for Mechanical, Electrical, and Plumbing. This is when electricians, plumbers, and HVAC technicians run all the new pipes, wires, and ducts through the open walls. This includes installing the main electrical panel or subpanel, running circuits for outlets and lights, installing supply and drain lines for a bathroom, and setting up the lines for a heating and cooling system, which is typically a ductless mini-split.
Why: All of this work is done before insulation and drywall so it can be inspected by the city. The inspector needs to see the wiring and plumbing before it gets covered up.
Watch out for: Passing the rough-in inspection. This is a major milestone. If you fail, the inspector will give you a list of corrections, and you can't proceed until they are fixed and re-inspected.
Step 7: Insulation and Drywall
After the MEP rough-in is approved, the walls and ceiling are filled with insulation. California's Title 24 energy code has strict requirements for insulation R-values, which vary by climate zone. Once the insulation is in and has passed its own inspection, the drywall is hung, taped, and mudded to create the smooth, finished walls and ceiling.
Why: Proper insulation is crucial for energy efficiency and comfort, and it's a requirement for getting your certificate of occupancy.
Watch out for: Air sealing. The inspector won't just check the insulation's depth; they'll look for gaps around windows, outlets, and fixtures that could lead to energy loss.
Step 8: Finishes and Fixtures
This is the stage where the space starts to look like a real room. The crew will paint the walls, install the flooring, hang interior doors, and install baseboards and trim. They'll also install all the finish fixtures: light switches, outlets, ceiling fans, plumbing fixtures like toilets and faucets, and any cabinetry or shelving.
Why: The quality of the finish work is what you will see and interact with every day. It's what makes the space feel complete and professional.
Watch out for: The punch list. Walk through the space with your contractor and create a detailed list of every little thing that needs to be fixed or touched up before you make the final payment.
Step 9: Final Inspection and Occupancy
Once all work is complete, you'll call for a final inspection. The building inspector will visit the site one last time with your approved plans in hand. They'll check that the finished project matches the plans and that all life-safety items, like smoke detectors and the egress window, are installed and working correctly. If everything passes, they will sign off on the permit, and the city will issue a Certificate of Occupancy.
Why: The Certificate of Occupancy is the official document that proves your garage conversion is a legal, habitable space. It closes out the permit and finalizes the project in the city's records.
Watch out for: Delays. Don't plan to move in the day of the final inspection. If the inspector finds an issue, you'll have to fix it and schedule a re-inspection, which can take days or weeks.
Information Gain: The Hidden Structural Hurdles Most Homeowners Miss
Most articles on garage conversions focus on finishes and floor plans. They miss the most important part: the structure. A garage is not built like a house. Ignoring this fact is the fastest way to fail inspection and waste a lot of money. Three areas are critical.
First, the slab. Your garage floor is a slab-on-grade, designed to hold a 4,000-pound vehicle. It was not designed to be a warm, dry floor for a bedroom. It almost never has insulation underneath it and often lacks a proper vapor barrier. This means moisture from the ground can wick up through the concrete, creating a damp, cold room. To fix this, code requires a multi-step solution: a sealed vapor barrier on top of the old slab, a layer of rigid foam insulation, and then a new layer of concrete or subfloor on top. This also helps raise the floor to match the height of the main house, avoiding an awkward step-down.
Second, the garage door opening. You can't just take out the door and frame a normal wall in its place. That huge opening was a structural weak point. The wall that replaces it must be engineered to restore the strength of the building, especially in earthquake-prone California. This is called a shear wall. It requires specific nailing patterns, thicker plywood sheathing, and special metal connectors called hold-downs that bolt it directly to the foundation. An engineer must design this wall, and the inspector will check their calculations and your contractor's work very carefully.
Third, the ceiling structure. The ceiling joists in a garage are often undersized. They were only meant to hold up drywall, not a heavy, insulated ceiling assembly plus light fixtures. In many pre-1980s homes, these are simple 2x4s or 2x6s that will sag over time. Your structural plans will likely specify sistering new, larger joists alongside the old ones or replacing them entirely to meet the code requirements for a habitable space. A shaky or sagging ceiling is a dead giveaway of an unpermitted conversion.
Navigating California's Regional Challenges: Seismic, Fire, and Coastal Risks
California is not a monolith. A garage conversion in coastal Santa Monica faces different environmental challenges than one in the wildfire-prone hills of San Diego County or the blistering heat of the Central Valley. Your plans must account for these regional risks.
Seismic Retrofitting: Virtually all of California is in a seismic hazard zone. For a garage conversion, this means ensuring the structure has a continuous load path and adequate bracing. This often involves bolting the garage's sill plates to the foundation, if they aren't already, and adding plywood shear walls, especially on the wall that replaces the garage door. In older homes, particularly those with unreinforced masonry or cripple walls, the conversion can trigger a requirement to seismically retrofit the entire structure.
Wildfire Defensible Space: If your home is in a High Fire Hazard Severity Zone, as designated by CAL FIRE, your conversion must comply with Chapter 7A of the California Building Code. This means using ignition-resistant materials for siding and roofing, installing double-paned windows with tempered glass, and ensuring vents are properly screened to prevent embers from entering the structure. You'll also need to maintain a defensible space around the new living area.
Coastal Conditions: For homes in the coastal zone (within about 1,000 yards of the ocean), humidity and salt spray are major concerns. All metal hardware, including nails, straps, and fasteners, must be stainless steel or hot-dip galvanized to prevent corrosion. Proper waterproofing and vapor barriers are even more critical to prevent moisture intrusion and mold growth. Your HVAC system should also be rated for coastal use.
Energy Efficiency (Title 24): California's energy code, Title 24, is one of the strictest in the country. The requirements vary by the state's 16 climate zones. A conversion in Palm Springs will require higher-rated insulation and more efficient windows than a project in foggy San Francisco. Your plans must include a Title 24 energy report demonstrating compliance. This is a common point of failure at plan check if not handled by an experienced professional. If you need help finding a pro who understands these local nuances, Renology's network can connect you with vetted local contractors.
Permits, Plans, and City Hall: Your Garage Conversion Playbook
Navigating the permit process is often the most intimidating part for homeowners. The good news is that California has passed several state laws to make it easier, particularly when the conversion is classified as an Accessory Dwelling Unit (ADU). The California Health and Community Development (HCD) ADU Handbook is an essential resource that outlines the rules. Under laws like AB 68, cities must act on ADU permit applications within 60 days, and they cannot impose restrictive requirements like off-street parking replacement if you are within a half-mile of public transit.
Even with this streamlining, the process is meticulous. You will need a complete set of plans, including a site plan, floor plans, elevations, and structural and energy calculations. Most homeowners hire an architect, designer, or design-build firm to produce these. Your contractor then submits this package to the local building department. The plan checker's job is to ensure every detail complies with code. Once approved, you get a permit card that must be posted on-site. The project will then undergo multiple inspections at key stages: foundation, framing, rough electrical and plumbing, insulation, and the final sign-off. Each inspection must be passed before you can proceed to the next step. Understanding these steps is crucial, as many are detailed in our guide to ADUs.
Project Timeline: From First Call to Final Inspection
Homeowners always ask how long a garage conversion will take. The honest answer is longer than you think. While the actual construction might take three to four months, the entire process from start to finish is closer to five to eight months.
- Phase 1: Design & Planning (4 to 8 weeks): This involves hiring your designer, completing the architectural and engineering drawings, and finalizing your scope of work.
- Phase 2: Permitting (8 to 16 weeks): The time your plans spend at the city building department. This is the biggest variable. A simple plan in an efficient city might get through in six weeks; a complex one in a busy city could take four months or more.
- Phase 3: Construction (12 to 16 weeks): This is the active building phase, from demolition to the final coat of paint. This timeline assumes no major delays from weather, material shortages, or failed inspections.
- Phase 4: Final Inspections & Closeout (1 to 2 weeks): Scheduling the final walkthrough with the city inspector and receiving your Certificate of Occupancy.
A realistic total timeline is about 6 months. If a contractor promises to do it in two months, they are either cutting corners or not pulling a permit. Be wary. Real construction takes time because it has to be done in sequence and verified by a third-party inspector at every critical step.
Checklist for Your California Garage Conversion
- Verify Zoning: Check with your local planning department to confirm a garage conversion is allowed on your property.
- Hire a Professional: Engage an experienced architect, designer, or design-build firm to create permit-ready plans.
- Get Multiple Bids: Interview at least three licensed and insured general contractors. Check their references and license status with the CSLB.
- Secure Financing: Have your financing in place before signing a contract.
- Establish a Contingency Fund: Set aside 10 to 15 percent of your total budget for unexpected issues.
- Review the Plans: Understand the blueprints before construction starts. Know where every outlet, switch, and light will go.
- Communicate Regularly: Schedule weekly check-ins with your contractor to stay informed about progress and challenges.
- Document Everything: Keep a file with your contract, plans, permits, change orders, and receipts.
- Prepare for Disruption: Construction is noisy, dusty, and disruptive. Plan accordingly.
- Don't Make Final Payment: Do not pay the final 10 percent until you have a signed-off final inspection and a completed punch list.
Sources & Methodology
See the Renology Methodology for how sources are reviewed, ranges are normalized, and planning-data limits are handled.
Cost ranges in this guide draw on the following named industry sources, public agency datasets, and Renology editorial research.
- California Department of Housing and Community Development (HCD) ADU Handbook (2024)
- California Building Standards Code (Title 24) (2022)
- National Association of Home Builders (NAHB) (2026)
- California Department of Industrial Relations, Prevailing Wage Determinations (2026)
- Los Angeles Department of Building and Safety (LADBS) Garage Conversion Guidelines (2025)
- Remodeling Magazine, Cost vs. Value Report (2026)
- CAL FIRE, Fire Hazard Severity Zones Maps (2024)
- California Assembly Bills 68, 970 (2020-2022)
Renology Take
The biggest mistake homeowners make is thinking of a garage conversion as a simple remodel. It’s not. It’s a change of use, and that means you’re taking a space that was never intended for human habitation and bringing it up to the same safety, structural, and energy codes as the rest of your house. The city inspector isn't there to admire your paint colors; they're there to verify the vapor barrier under your floor, the seismic connectors in your shear wall, and the size of your egress window. This isn't a weekend project. It’s a complex renovation that adds real, legal value to your home when done correctly. Treat it with that level of seriousness from day one, and you’ll have an asset, not a liability.
Frequently Asked Questions
Is a garage conversion to a bedroom cheaper than a home addition?
Do I need an architect for a garage conversion in California?
Can I convert my garage if I live in an HOA?
What are the legal requirements for a bedroom in California?
How does a garage conversion affect my property taxes?
Do I have to replace the parking I lose in a garage conversion?
Can I include a kitchen and a bathroom in my garage conversion?
What is the biggest mistake people make with a garage conversion?
Get 3 ADU bids in 48 hours.
Our editors already vetted ADU builders. Answer 4 questions and we send 3 written bids inside 48 hours, with the real price for your scope, not their inflated first-call number.
- Free, no commission
- Pre-screened locally
- Bids inside 48 hours
Takes about 60 seconds. We'll text you when bids arrive.
Sources
- California Department of Housing and Community Development (HCD) ADU Handbook
- California Building Standards Code (Title 24)
- National Association of Home Builders (NAHB)
- California Department of Industrial Relations, Prevailing Wage Determinations
- Los Angeles Department of Building and Safety (LADBS) Garage Conversion Guidelines
- Remodeling Magazine, Cost vs. Value Report
- CAL FIRE, Fire Hazard Severity Zones Maps
- California Assembly Bills 68, 970