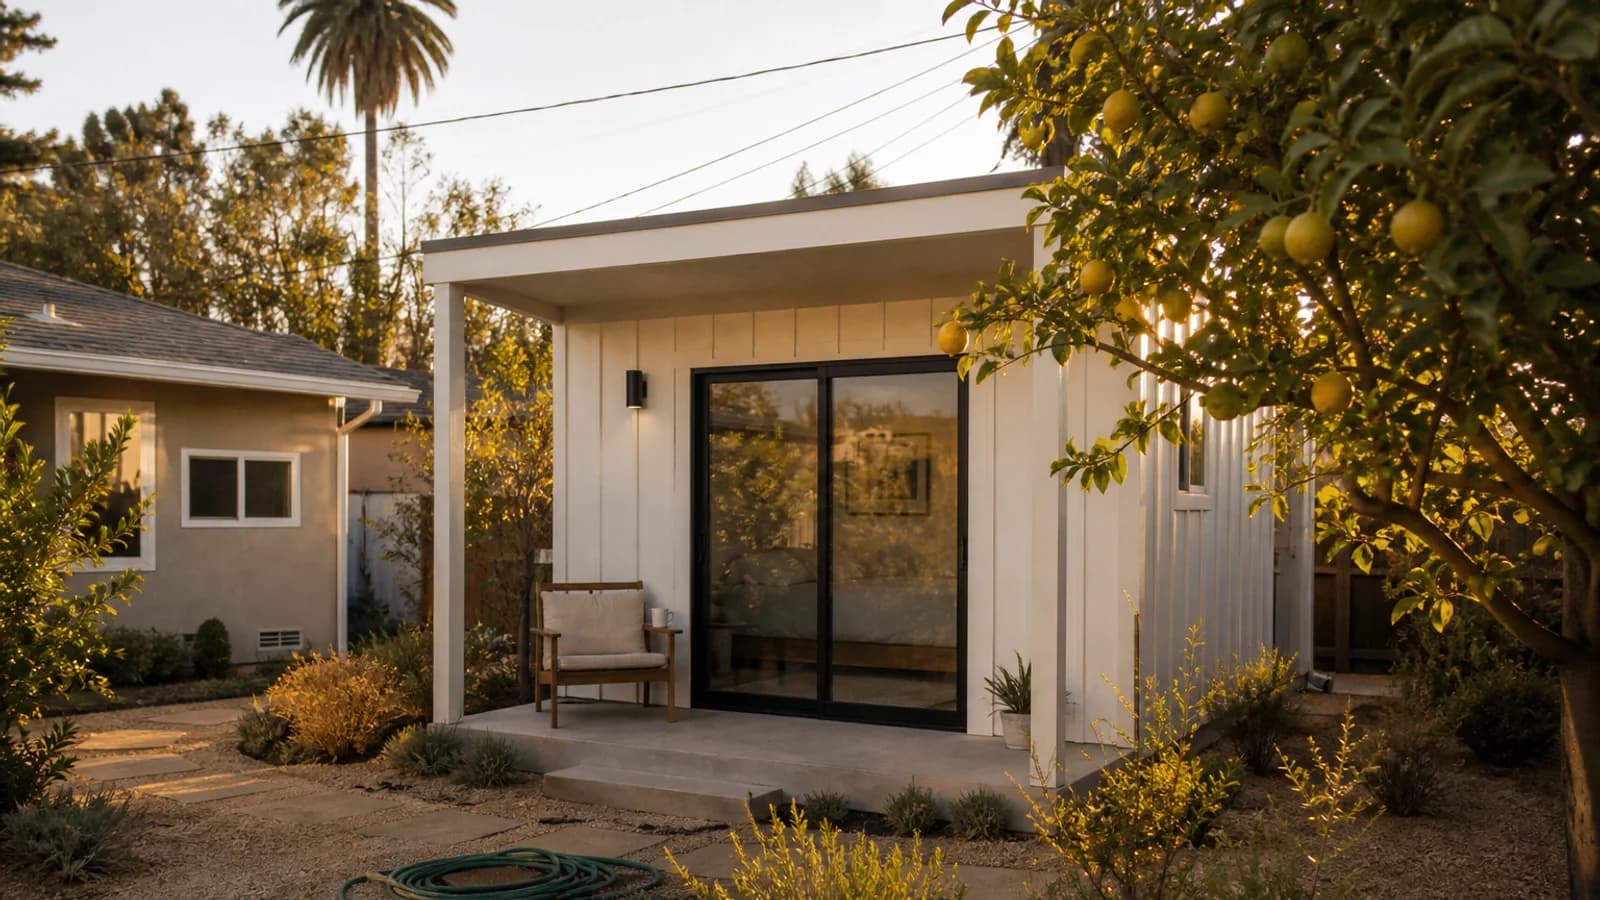
An accessory dwelling unit is a self-contained second home on the same lot as a single-family house, with its own kitchen, bathroom and entrance. In California it is legal on nearly every residential lot, costs $150,000 to $450,000, and takes 10 to 18 months from hiring a designer to holding a Certificate of Occupancy.
What is an Accessory Dwelling Unit?
First, let's get the terms right. An accessory dwelling unit, or ADU, is a self-contained home on the same lot as a primary single-family house. It has its own kitchen, bathroom, and living space. You might hear them called granny flats, in-law units, or backyard cottages. Accessory dwelling unit homes come in several forms. A detached ADU is a standalone backyard structure. An attached ADU shares a wall with the main house. A conversion ADU repurposes existing space, like a garage or basement. There are also Junior Accessory Dwelling Units (JADUs), which are smaller (under 500 square feet), must be within the existing main house footprint, and can share a bathroom with the main house. It is not a spare room. It is a legally recognized, separate dwelling.
The rules that make it possible are state rules, which is why this reads the same in Fresno as it does in Berkeley. AB 68 (2019) stripped out the local zoning barriers. AB 970 gave cities a 60-day shot clock to approve or deny. SB 9 opened lot splits. AB 1033 (2024) lets cities allow an ADU to be sold separately as a condominium. Your city administers all of it, but your city did not write it, and that distinction is what protects you when a plan checker gets creative. The Renology ADU guide tracks how each of these plays out in practice.
Related guide: Accessory Dwelling Unit For Rent in California
Related guide: Accessory Dwelling Unit For Sale in California
What an ADU Costs in California
A new accessory dwelling unit in California runs $150,000 to over $450,000. The bottom of that range can start lower for a simple garage conversion or an interior JADU, but a new detached unit with its own foundation and utility lines will always start higher. Run your own scope through the ADU cost calculator before you talk to anyone.
Where you build moves the number more than what you build. These are typical all-in ranges for a new detached unit of 600 to 800 square feet, 2026:
| Region | Detached ADU, all-in | Per square foot |
|---|---|---|
| Bay Area | $300,000 to $500,000 | $450 to $650 |
| Los Angeles metro | $250,000 to $450,000 | $375 to $550 |
| San Diego | $230,000 to $400,000 | $350 to $500 |
| Sacramento | $200,000 to $360,000 | $300 to $450 |
| Central Valley | $180,000 to $320,000 | $275 to $400 |
The spread is mostly labor. The Bay Area carries the highest trade wages in the state, on tight lots that make every delivery harder, with seismic engineering on top. Los Angeles has the deepest contractor supply in California, which helps, and the longest plan check plus the most expensive utility work, which does not. San Diego permits faster than LA but pays for coastal corrosion detailing. Sacramento gets lower labor rates, larger lots and simpler site access. The Central Valley has the cheapest labor and land in the state, and spends part of that back on heat-driven HVAC and insulation upgrades.
Inside any of those numbers, the split is consistent. Soft costs, about 10 to 15 percent of the total, cover design fees for architects or designers, structural engineering, soil reports, and city permit fees. Hard costs make up the bulk of the budget, around 75 to 85 percent. This is the labor and materials for the accessory dwelling unit construction itself: concrete, lumber, roofing, plumbing, electrical, and all finishes. The final bucket is utility connection fees, which are the major variable. Tapping into water, sewer, and power can range from a few thousand to over $25,000, depending on where the lines are.
If you are weighing an ADU against adding onto the house instead, the home addition cost calculator prices that path on the same basis, and the two rarely land where people expect.
For financing, homeowners typically use a cash-out refinance on their primary mortgage, a home equity line of credit (HELOC), or a construction loan. Each has its own approval process and interest rate structure, and each one wants to see a real budget before it will fund.
Why ADU Construction in California Costs What It Does
Three things drive the cost of building here: labor, materials, and regulation. Skilled labor is not cheap, and there is not enough of it. According to California Department of Industrial Relations prevailing wage data, published county by county, certified tradespeople command high hourly rates, and the spread between Alameda County and Fresno County is real money on a nine-month job. A good framing crew or licensed electrician is in constant demand everywhere.
Second, material costs are volatile. Everything from lumber to concrete to insulation has seen price swings due to supply chain issues. Third, regulation adds expense, and in California it adds it statewide. Title 24 energy code requires high-performance windows and insulation, which cost more upfront. Seismic building codes, essential in most of the state, mean more hardware, shear walls, and engineering oversight.
Then there are the fees, and this is where your city stops being interchangeable. Every building department charges plan check and permit fees, and they are not close to uniform: the Los Angeles Department of Building and Safety (LADBS) and San Diego's Development Services Department (DSD) price the same 700-square-foot unit differently. Local school districts can levy impact fees. Every utility charges connection fees, whether that is the Los Angeles Department of Water and Power (LADWP), PG&E in the north, or SDG&E in the south. These are not suggestions. They are required costs to get your project approved and signed off, and they are the line item homeowners most often leave out of the budget entirely.
Three ADU Project Scopes and Budgets
Three representative projects from 2026, scoped similarly, reconstructed from Renology's Project of the Day network and used here in aggregate form:
- Garage Conversion in Mar Vista, Los Angeles ($165,000): A 400-square-foot studio ADU converted from a detached two-car garage. The project required reinforcing the existing slab and framing to meet current code. A new 3/4 bathroom and a kitchenette were installed. The existing electrical panel on the main house was sufficient, but a new subpanel was run to the ADU. The big cost surprise was needing to trench 80 feet for a new sewer line connection, as the old garage had no plumbing. Price a scope like this with the garage conversion cost calculator.
- Attached JADU in Curtis Park, Sacramento ($190,000): A 500-square-foot, one-bedroom Junior Accessory Dwelling Unit created by converting an attached garage and extending it by 100 square feet. This required a new foundation for the extension and careful work to integrate the roofline. As a JADU, it was allowed to share the main house's HVAC and water heater, which saved some cost. However, creating the fire-rated separation wall between the JADU and main house was a significant labor item.
- New Detached ADU in Sherman Oaks, Los Angeles ($425,000): An 850-square-foot, two-bedroom, one-bathroom backyard accessory dwelling unit built from the ground up. This was a full new home build at a smaller scale. It required a new foundation, all new utility trenching from the street, a separate address, and its own HVAC system. The cost reflects higher-end finishes, including custom cabinets, stone countertops, and bifold patio doors. Site access was tight, which increased labor costs for material handling.
Reconstructed from Renology's Project of the Day network and used in aggregate; your lot, city and finishes move these.
How to Budget for Surprises
The numbers on a contractor's bid are a starting point. The final cost is rarely the same. The National Association of Home Builders recommends a ten to fifteen percent contingency on renovations in homes over thirty years old. For an ADU project, which often involves digging around old houses, this is not optional.
The common surprises repeat across the state. You dig into undocumented and abandoned sewer lines from a previous structure. You find that the main house's electrical panel is maxed out and needs a full, expensive upgrade to support the ADU's load. In older housing stock, whether that is Silver Lake in Los Angeles or the Fruitvale bungalows in Oakland, it is common to find knob-and-tube remnants in the main house that must be remediated before new circuits can be added. Or the big one: the city requires you to replace the first 10 feet of your sewer lateral because it is cracked clay pipe, a $15,000 surprise. Your contingency fund is what keeps the project moving when these things happen. Without it, you are stuck.
Step 1: Feasibility and Design
Why: This stage determines what you can legally build and what it will look like before you spend a dime on construction. Watch out for: Zoning codes and utility easements can kill a project before it starts. You must verify your property's specific limitations with your city's building or planning department. This is not just about setbacks from your property line. You need a site survey to locate underground utilities. You cannot build a foundation over a sewer line. During this phase, you will hire an architect or a specialized ADU design-build firm. They will draw the plans that will be submitted for permits.
Many California cities now run a pre-approved plan program to shorten this step, including the Los Angeles RTI (Ready-to-Issue) Standard Plan Program and San Jose's and San Diego's equivalents. These plans have already cleared city review, so plan check moves faster. They also work best on flat, standard-sized lots. If your property has a significant slope, like the hillside lots in Echo Park or the Oakland hills, you will need a custom design and a soil report from a geotechnical engineer. This initial investment in proper planning prevents costly changes later, and the permit timeline data is worth reading before you commit to a design.
Step 2: Securing Your Building Permit
Why: A building permit is your legal license to construct the project; working without one leads to stop-work orders and fines. Watch out for: Submitting an incomplete set of plans will get you stuck in a cycle of corrections with the city plan checker. Your designer or architect submits the architectural and structural plans for review, and the department checks them against the building code, the zoning code, and state ADU law. This is the same review everywhere, run by different desks: LADBS in Los Angeles, DSD in San Diego, Planning and Building in San Francisco, Community Development in Sacramento.
AB 970 created a 60-day shot clock for cities to approve or deny an ADU application, and it is the most useful sentence in the statute for a homeowner. It only starts once your application is deemed complete. If the checker finds issues, corrections come back and the clock resets. This is where a good designer earns their fee, by anticipating what the department will ask for before it asks. Once plans are approved, you or your contractor pull the permit, pay the fees, and get the official inspection card, which must be posted at the job site. The permit timeline tool shows what each stage has actually been taking.
Step 3: Site Prep and Foundation
3 ADU builders, editor-screened. 4 questions.
See my 3 matchesWhy: The foundation is the most critical structural element; if it is not right, nothing else will be. Watch out for: Much of California sits on expansive clay soil that swells when wet and shrinks when dry, which can crack a poorly designed foundation. Your house is only as good as what it is sitting on. This phase starts with demolition of any existing structures, followed by grading the site to ensure proper drainage. Trenching comes next, creating channels for the new water, sewer, gas, and electrical lines. This is dirty, loud work.
The foundation itself is typically a monolithic concrete slab-on-grade. The crew sets up forms, lays down a vapor barrier and rebar reinforcement, and does a pre-pour inspection for plumbing and electrical conduit embedded in the slab. Then the concrete truck arrives. For hillside properties, you may need a raised foundation with deep concrete piers, called caissons, drilled into the bedrock for stability. That requires a specialized crew and adds significant cost. A foundation inspection is required before you can pour.
Step 4: Framing, Roofing, and Rough-ins
Why: This is when the building takes its three-dimensional shape and passes its first major inspections. Watch out for: A framing inspection will fail if the load path is not continuous and properly connected from the roof to the foundation. After the foundation cures, the framing crew arrives. In a matter of days, the walls, floors, and roof structure go up. This is the skeleton of your accessory dwelling unit. Framers install the joists, studs, rafters, and the structural sheathing that gives the walls their rigidity against seismic forces. Once the roof is sheathed, it is covered with underlayment to protect the structure from rain.
Then comes the rough-in stage for MEP: mechanical (HVAC ducts), electrical (wiring), and plumbing (supply and drain lines). The electrician runs wires to every switch, outlet, and light fixture box. The plumber runs PEX pipes for water and ABS for drains. A critical part of this stage is confirming the main house's systems can handle the new load, which often means a full electrical panel upgrade. The city inspects each of these systems separately before any insulation or drywall goes in.
Step 5: Exterior, Insulation, and Drywall
Why: The building envelope creates a conditioned space and provides the first line of defense against water and weather. Watch out for: Improperly installed window and door flashing is the number one cause of water intrusion and dry rot. With the rough-ins approved, the focus shifts to closing up the structure. Windows and exterior doors are installed. The building is wrapped in a weather-resistant barrier. Then the exterior siding or stucco is applied. This is also when the roofing material, whether asphalt shingles or a standing-seam metal roof, is installed.
Inside, insulation is placed in the wall cavities and attic. Title 24 dictates the required R-value, and the required values differ by climate zone, which is why the same plan set costs more to build in Redding than in Santa Monica. An insulation inspection verifies it was installed correctly. Only after that passes can the drywall be hung, taped, and finished. For properties in a High Fire Hazard Severity Zone, which covers a large share of the state's foothill and canyon lots, exterior materials must meet specific fire-resistance ratings, adding another layer of compliance.

Step 6: Interior Finishes and Fixtures
Why: This long phase turns the empty box into a habitable home with functional, finished spaces. Watch out for: Supply chain delays on a single item, like a back-ordered appliance or tile, can halt the entire finishing sequence. The last ten percent of the work takes thirty percent of the time. This is where your design choices become reality. It starts with flooring, whether tile, engineered wood, or LVP. Then kitchen and bathroom cabinets are installed, followed by countertops. Interior doors, baseboards, and window trim are put in place and painted.
The plumber returns to set the final fixtures: sinks, faucets, toilets, and the shower valve trim. The electrician installs switches, outlets, light fixtures, and appliances. The HVAC contractor installs the furnace or mini-split heads and the thermostat. This phase requires careful coordination between multiple trades working in a small space. A good general contractor earns their money here by managing the schedule and making sure one trade does not damage the completed work of another. This is also where the budget gets away from you if you have not made all your selections before construction begins.
Step 7: Final Inspections and Certificate of Occupancy
Why: You cannot legally rent or occupy the ADU until the city has declared it safe and complete. Watch out for: A single missing item, like a smoke detector or a house number, can cause you to fail the final inspection and delay your move-in. This is the last hurdle. Once all work is complete, you schedule a final inspection. The inspector walks through the accessory dwelling unit with the approved plans in hand and checks a long list: smoke and carbon monoxide detectors properly placed, plumbing fixtures working, electrical outlets grounded, the water heater correctly strapped, and countless other details.
They are confirming that the final product matches the approved plans and meets all life-safety codes. If everything passes, the inspector signs off on your inspection card for the last time and the city issues the Certificate of Occupancy. That document is proof your accessory dwelling unit was built to code and is a legal, habitable dwelling. It is what you need for insurance, for financing, and to legally have a tenant move in.
Information Gain: The Hidden Costs of Utility Hookups
What no one else covers in enough detail is the brutal reality of utility connections. Contractors list utility hookups as an "allowance" in their bids because the final cost is unknowable until you are deep in the process with the utility, whether that is LADWP, PG&E, SDG&E, SMUD or your local water district. A new detached backyard accessory dwelling unit often requires its own separate meters. This is not a matter of running a pipe from the main house. It can mean trenching all the way to the street.
If your property is on a busy road, that may require a separate public works permit for a street cut, traffic control plans, and repaving to city standards. That alone is a $10,000 to $20,000 line item. Utilities also charge a capacity fee for a new water meter, which can be thousands of dollars, calculated on the meter size your ADU needs and whether a fire sprinkler system is required.
The real nightmare is when connecting the new ADU exposes problems with the main house. You discover the primary residence has galvanized supply lines so corroded they cannot support the additional demand, and now you are repiping the main house, a separate expensive project you did not budget for. Or connecting to an old clay sewer lateral reveals cracks that require replacement out to the city main. These utility surprises are the single biggest cause of budget overruns on ADU projects, in every market in the state.
Project Timeline: A Realistic Calendar
Building an ADU is not fast. Anyone who tells you four months is selling you something. Plan for 10 to 18 months from the day you hire a designer to the day you get your Certificate of Occupancy.
| Phase | Duration | What decides it |
|---|---|---|
| Design and feasibility | 2 to 4 months | Survey, soil report, your decisions |
| Permitting and plan check | 2 to 5 months | Submittal completeness |
| Build, garage conversion | 4 to 6 months | Slab condition, sewer access |
| Build, new detached | 6 to 9 months | Foundation, trenching, finishes |
| Total, new detached | 10 to 18 months | Hillside adds 2 to 3 |
Two things stretch that calendar more than anything else. The 60-day shot clock only runs on a complete application, so every correction cycle resets it, and a hillside lot or a rejected pre-approved plan adds two to three months of engineering before you resubmit. That is how a 10-month project becomes an 18-month one. Patience is not a virtue in construction. It is a requirement.
Checklist for Your California ADU Project
- Verify zoning and property eligibility with your city's online parcel system.
- Read the ADU guide end to end before your first meeting.
- Interview at least three architects or design-build firms.
- Develop a complete set of architectural and structural plans.
- Obtain a soil report if required for your lot's geology.
- Check whether your city has a pre-approved plan program before commissioning a custom design.
- Submit plans and manage the correction process, tracking the 60-day clock.
- Vet and hire a licensed, insured general contractor. Verify the CSLB license number yourself, or start with a screened local pro.
- Secure financing and establish a 15% contingency fund.
- Finalize all material and finish selections before construction starts.
- Pull the permit and post the inspection card at the job site.
- Ensure all phased inspections (foundation, framing, MEP) are called for and passed.
- Conduct a final walkthrough with your contractor to create a punch list.
- Receive the signed-off final inspection and Certificate of Occupancy.
Renology Take
State law opened the door for ADUs, but it did not pave the road. The biggest mistake homeowners make is underestimating the project's complexity. This is not a product you buy. It is a small house whose construction you manage. Your job is risk mitigation: in your budget, in your timeline, and in your contractor choice. The regulations removed the zoning barriers, but the laws of physics, economics, and municipal bureaucracy remain undefeated. A backyard accessory dwelling unit pencils out as a strong investment over ten years, either as a rental or for multi-generational living. Its success depends entirely on acknowledging the reality of the construction process. Go in with your eyes open, a solid set of plans, and a deep contingency fund. If you want the service side of this, our ADU construction practice is built around exactly this sequence.
Sources & Methodology
Renology reviews public permit and labor signals, supplier pricing, remodeler quote patterns, comparable projects, the Renology Cost Index, and the Renology Methodology. Cost references are planning ranges for local ADU projects, not fixed bids.
To give you the most accurate picture of the ADU landscape, we base our analysis on data from industry and government sources. These include:
- California Department of Housing and Community Development, ADU Handbook, 2025
- California Department of Industrial Relations, prevailing wage determinations by county, 2026
- Los Angeles Department of Building and Safety (LADBS) ADU Ordinance and Information Bulletins, 2026
- National Association of Home Builders (NAHB) Construction Cost Survey, 2025
- U.S. Census Bureau, Building Permits Survey, 2026
- Remodeling Magazine, Cost vs. Value Report, Pacific region, 2026
- Harvard Joint Center for Housing Studies, Leading Indicator of Remodeling Activity (LIRA), Q4 2025
- AIA California, Regional Design and Practice Committee Reports, 2026
- California Legislative Information for AB 68, AB 970, AB 1033, and SB 9
- Los Angeles Department of Water and Power (LADWP), New Service Connection Fee Schedule, 2026
Frequently Asked Questions
What's the difference between an ADU and a JADU in California?
Can I build an ADU on my property in California?
How does financing an accessory dwelling unit work?
Do I need an architect for my ADU?
How much value does an ADU add to my home?
What are the rules for renting out an ADU in California?
Can I sell my ADU separately from my main house?
What is a pre-approved ADU plan program?
Ready to find a pro?
Tell us about your project and location. A Renology advisor can help you explore contractor matching.
Free for homeowners. No obligation to hire.
Find a ProSources
- Los Angeles Department of Building and Safety (LADBS) ADU Ordinance and Information Bulletins
- California Department of Housing and Community Development, ADU Handbook
- California Department of Industrial Relations, Los Angeles County Prevailing Wage Data
- National Association of Home Builders (NAHB) Construction Cost Survey
- U.S. Census Bureau, Building Permits Survey
- Remodeling Magazine, Cost vs. Value Report, Los Angeles
- Harvard Joint Center for Housing Studies, Leading Indicator of Remodeling Activity (LIRA)
- AIA Los Angeles, Regional Design and Practice Committee Reports
- California Legislative Information for AB 68, AB 970, and AB 1033
- Los Angeles Department of Water and Power (LADWP), New Service Connection Fee Schedule
Follow Renology on Google
Choose Renology as a preferred source and our guides show up more often in your Google results, including Top Stories and AI Overviews.