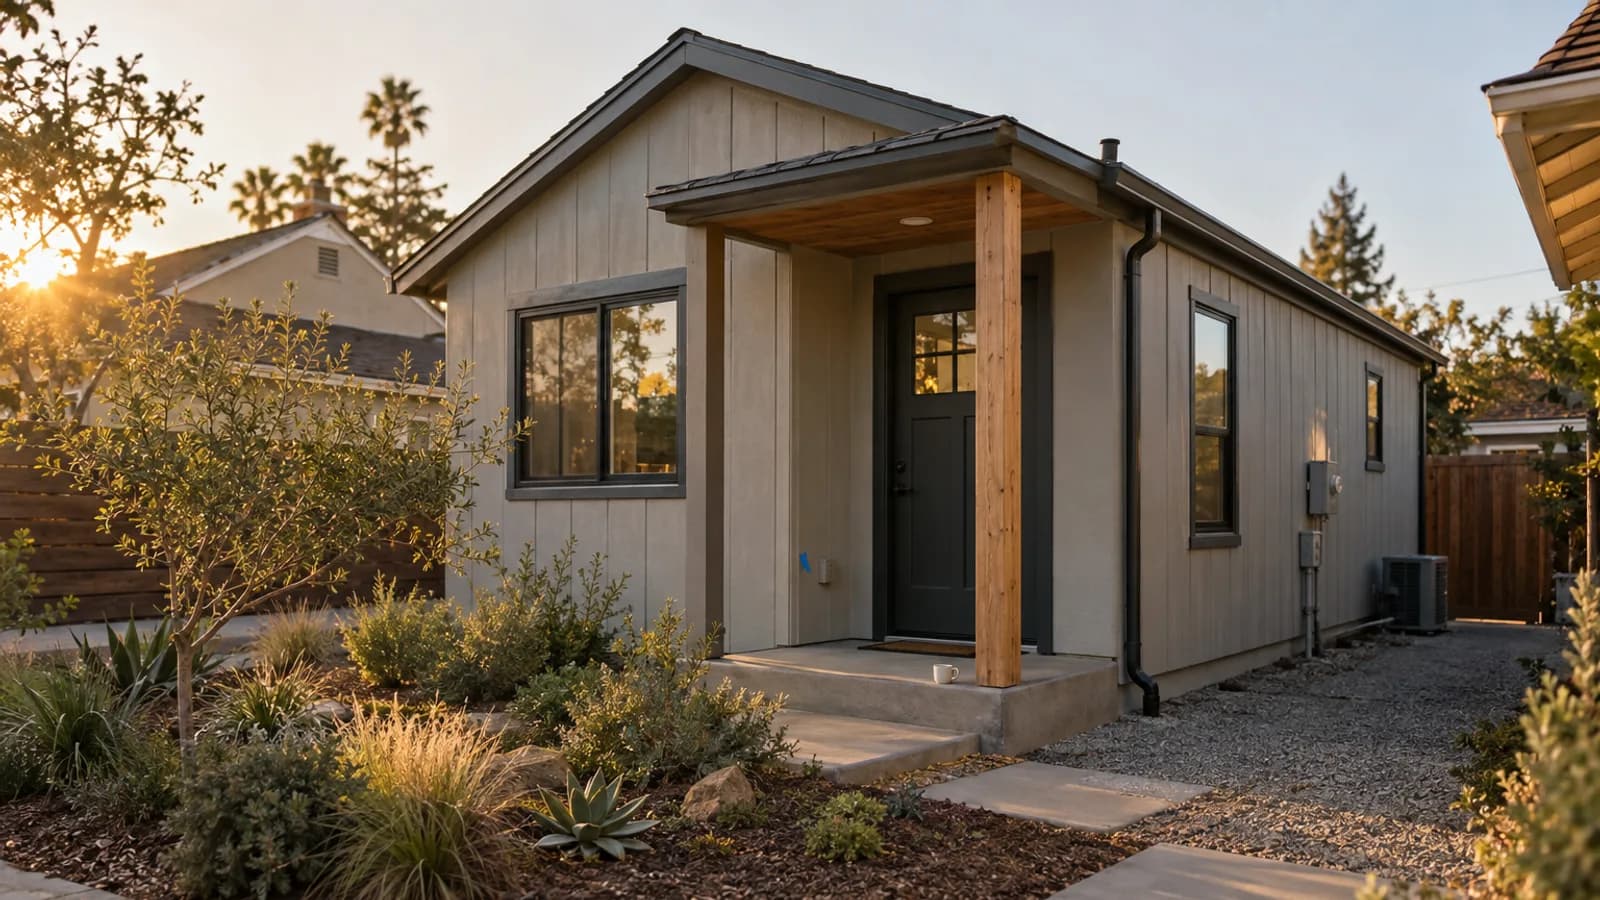
Selling a backyard unit used to be a legal fiction in California. You sold the whole property or nothing. That changed. With AB 1033 signed into law, you can now create an 'ADU condominium' and sell your accessory dwelling unit separately from the main house. This isn't a simple handshake deal. It's a full-blown construction and legal process that turns a rentable asset into a sellable one. Getting it right means building a structure that not only meets code but also commands market value. Getting it wrong means a pile of unrecoverable costs and a unit you can't legally sever. This guide lays out the path from raw dirt to a recorded deed. We'll cover the build, the budget, and the bureaucracy.
In a Nutshell
- The New Law: California Assembly Bill 1033 allows homeowners to sell their ADUs as condominiums, separate from the primary residence, provided their local jurisdiction opts in.
- It's a Process: This involves not just building the ADU to code, but also a legal process involving a surveyor, a real estate attorney, and recording a condo map with the county.
- Costs Vary Widely: A basic ADU build can start around $180,000 in lower-cost areas and soar past $500,000 for custom designs in high-cost metros like the Bay Area. Selling it adds legal and transactional costs.
- Inspection is Everything: The entire process is governed by building department inspections. A failed inspection on the load path or utility connections can stop the project for weeks.
- Financing is Key: Lenders are still adapting to this new asset class. Securing financing for both the construction and for the eventual buyer requires clear, permitted plans and a solid contractor.
What is an 'Accessory Dwelling Unit for Sale'?
An accessory dwelling unit for sale is a residential unit, built on the same lot as a primary home, that has been legally separated for individual sale. Before 2024, this was impossible in California. You could build an ADU and rent it out, but it remained part of the primary property's title. Thanks to Assembly Bill 1033, that's no longer the case. The law gives cities and counties the option to allow homeowners to treat their ADUs like condominiums. This means you can hire a surveyor to draw up a new plat map, create a homeowners association (HOA) with the main house to govern shared spaces like a driveway or yard, and sell the ADU with its own title and deed. It transforms a rental income stream into a lump sum of capital. This is a game-changer for homeowners looking to cash in on equity without selling their primary residence, or for creating affordable homeownership opportunities. The key is that this is an opt-in system. Your local jurisdiction must pass an ordinance allowing it, so the first step is always to check with your city or county planning department.
Step 1: The Feasibility Study
Before you draw a single line, you need to know if you can build and sell. This is the due diligence phase. It's about confirming your property is eligible under state and local laws. You'll check your local zoning code for setback requirements, maximum unit size, and height limitations. California state law, specifically AB 68 and its successors, sets minimum standards that cities must allow, like 4-foot side and rear setbacks, but your local ordinance can have its own rules. You also need to assess utility capacity. Can your existing water, sewer, and electrical panels handle another dwelling? In older homes, like pre-1985 builds with galvanized supply lines, you're almost certainly looking at a full utility upgrade from the street. This isn't just a cost, it's a major scope item that involves trenching and city permits. Finally, confirm your city has opted into AB 1033. If they haven't, you can build an ADU, but you can't sell it separately.
Why: This step prevents you from spending tens of thousands on design for a project that was never viable.
Watch out for: Unrecorded easements or utility lines running through your proposed building footprint can kill a project before it starts.
Step 2: Design and Engineering
Once you've confirmed feasibility, it's time for design. This is where you translate your vision into a set of construction documents, or blueprints, that a contractor can build from and a building department can approve. You’ll need an architect or a designer to draw up the floor plans, elevations, and site plan. More importantly, you'll need a structural engineer to specify the foundation, the framing, and the shear walls. In California, this is non-negotiable. The engineer's stamp on the drawings confirms the design can withstand seismic loads, as required by the California Building Code. This is also the stage where you make key decisions about materials and systems. Will you use a standard slab-on-grade foundation or a raised foundation with a crawl space? Will the framing be traditional stick-built, or will you use Structural Insulated Panels (SIPs)? These choices have huge implications for cost, timeline, and energy performance. For a project with a clear path to sale, you should also engage a surveyor now to begin work on the condominium map that will be required later.
Why: Stamped, engineered plans are the only way to get a building permit and accurate bids from contractors.
Watch out for: Value engineering after the plans are done is expensive; lock in your major material choices before the engineer starts their calculations.
Step 3: Submitting for Permits
With a full set of plans, you're ready to pull a permit. This process involves submitting your construction documents to your local city or county building department, for example, the Los Angeles Department of Building and Safety (LADBS) or the San Diego Development Services Department. They will conduct a plan check, where specialists from different divisions (structural, electrical, mechanical, plumbing, zoning) review your plans for code compliance. California's SB 13 put a 60-day 'shot clock' on this process for most ADUs, which has sped things up considerably. However, if your plans are incomplete or contain errors, the department will send back corrections, and the clock resets. This is where a good designer or permit expediter earns their money. They know what plan checkers look for and can anticipate comments, avoiding weeks of delays. Once all departments sign off, you pay the permit fees and receive your inspection card. This card is your license to build, and it must be posted on the job site for every inspection.
Why: Building without a permit is illegal and results in stop-work orders, fines, and the potential for having to tear down the work.
Watch out for: Scope-lock is critical here; any significant change to the design after the permit is issued requires a plan revision and another review cycle.
Step 4: Site Prep and Foundation
This is where the real work begins. Site preparation involves clearing and grading the build area, and most critically, trenching for your new utilities. This is often the biggest surprise for homeowners. The cost isn't just the pipe; it's the excavator, the labor to dig a 30-foot trench from the street to the ADU, and the cost of connecting to the city's main sewer and water lines, known as tapping fees. These fees alone can be thousands of dollars. Once the underground rough-in for plumbing and electrical conduit is complete and inspected, you're ready for the foundation. In California, this is typically a monolithic slab-on-grade. The form boards are set, a vapor barrier is laid down, rebar is placed in a grid according to the engineer's spec, and the whole assembly is inspected. This 'pre-pour' inspection is one of the most important. The inspector checks the rebar spacing, the depth of the footings, and the hold-downs that will anchor the walls to the foundation. A failed inspection here is a major setback. Once it passes, the concrete truck arrives.
Why: A solid, square, and level foundation is the basis for the entire structure; everything else depends on it.
Watch out for: Expansive clay soil, common in areas like the San Fernando Valley, requires a more solid, post-tensioned slab, adding significant cost over a standard foundation.
Step 5: Framing and Rough-In
With the foundation cured, the structure starts to take shape. The framing crew arrives to lay out the sole plates, tilt up the walls, set the roof trusses, and sheath the exterior with plywood or OSB. This is where the load path becomes visible. You can see how the weight of the roof is carried by the trusses, down through the wall studs and headers, and into the foundation via the hold-downs. Every connection is specified by the engineer to resist both gravity and the lateral forces of an earthquake. After the structure is framed and the roof is weathered in, the MEP (Mechanical, Electrical, Plumbing) trades come in for the rough-in. Plumbers run PEX supply lines and ABS drain lines, electricians pull wire to every box, and the HVAC tech installs the ducting and refrigerant lines. This phase ends with a four-way inspection: framing, electrical, plumbing, and mechanical, all done at once before any insulation or drywall is installed. The inspector will check everything from the nailing pattern on the shear walls to the gauge of the wiring. You can explore a variety of ADU construction options with vetted professionals to ensure this phase goes smoothly.
Why: The rough-in phase is your only chance for an inspector to see what’s inside the walls; passing this is a major milestone.

Watch out for: Remnants of old wiring, like knob-and-tube in 1960s LA Tudors, can complicate the electrical tie-in and add unexpected costs.
Step 6: Finishes, Inspections, and Certificate of Occupancy
3 ADU builders, editor-screened. 4 questions.
See my 3 matchesOnce the rough-in is signed off, the walls get closed up. Insulation is installed and inspected, then drywall is hung, taped, and textured. From there, it’s all about the finishes you selected months ago: flooring, tile, cabinets, countertops, light fixtures, and plumbing fixtures. Each step builds on the last. The painters can't start until the drywall is perfect, and the flooring can't go in until the painting is done. This phase feels fast, but it requires careful coordination of many different trades. As you near completion, you'll schedule your final inspections. This includes the building final, electrical final, plumbing final, and potentially sign-offs from the fire department or public works. The building inspector will walk the site with the final inspection card, checking for things like proper GFCI protection, smoke detector placement, and that the address is clearly posted. Once every required signature is on that card, you can apply for your Certificate of Occupancy (C of O). This official document is the city's declaration that the structure is safe and legal to live in. It's the key that unlocks the final step.
Why: The Certificate of Occupancy is the legal proof that your ADU was built to code and is a habitable dwelling.
Watch out for: Any deviation from the approved plans, even something as small as moving a window, can hold up your final inspection until it's corrected or a plan revision is approved.
Step 7: The Condo Map and Legal Sale Process
With a C of O in hand, you have a legal dwelling. Now, to sell it, you need to create a legal entity. This is where you move from construction to real estate law. You'll work with a surveyor and a real estate attorney to create a condominium plan. This is a set of legal documents and drawings that define the ADU as a separate unit, or 'airspace condominium'. It specifies the exact boundaries of the unit you're selling and defines the common areas that will be shared with the main house (like the yard, driveway, or roof). You will also create a small Homeowners Association (HOA) to manage these common areas and establish rules (CC&Rs) and a budget for shared maintenance. This entire package is submitted to your local planning department and the California Department of Real Estate for approval. Once approved, the condo map is recorded with the county recorder's office. At that moment, your single-family lot now legally contains two separate, sellable properties. You can list the accessory dwelling unit for sale with a real estate agent, and a buyer can get a conventional mortgage to purchase it.
Why: This legal process is the only way to create a separate title for the ADU, making it a distinct asset that can be sold.
Watch out for: Lender hesitation is a real risk; since this is a new type of asset, financing for your first buyer may require educating the underwriter.
ADU Construction Costs in California
The cost to build an accessory dwelling unit in California is a wide range. A simple garage conversion or a small, basic prefab unit can sometimes start lower, but for a typical new-construction detached ADU, you should expect to invest between $250,000 and $450,000. In high-cost areas like the Bay Area or coastal Los Angeles neighborhoods like Venice or Mar Vista, a high-end, custom 1,000-square-foot ADU can easily exceed $500,000. This works out to a per-square-foot cost of $400 to $700, which often surprises homeowners who expect it to be less than a primary residence. But an ADU has its own kitchen, bathroom, foundation, and utility hookups, all of which carry high fixed costs, regardless of the unit's size.
Costs vary significantly by region. A project in Sacramento or the Central Valley might come in at $350 per square foot, while the same build in San Jose or Santa Monica could be $650 per square foot. The primary driver of this difference is labor. According to the California Department of Industrial Relations prevailing wage data for Los Angeles County, skilled trades are billing at high rates, and that cost is passed directly to the project. Materials, site conditions, and the level of finish you choose also play a huge role. For a more detailed estimate based on your specific project, you can use an ADU cost calculator to model different scenarios.
Costs are for construction only and vary by location, size, and finishes. Does not include legal fees for condo conversion.
Three representative projects from 2026, scoped similarly, reconstructed from Renology's Project of the Day network and used here in aggregate form:
- $180,000 in Bakersfield: A 400-square-foot garage conversion. This project reused the existing foundation and three walls, saving significant structural costs. The budget included new electrical and plumbing tied into the main house, standard-grade finishes, and a ductless mini-split for HVAC.
- $325,000 in San Diego: A 650-square-foot detached ADU in the North Park neighborhood. This was a new build on a level lot with straightforward utility connections. It featured a slab-on-grade foundation, standard wood framing, mid-grade finishes like quartz countertops and LVP flooring, and solar panels as required by California code.
- $500,000 in Palo Alto: An 800-square-foot, two-story detached ADU built over a new garage. The complexity of the two-story structure, the high cost of labor in the Bay Area, and premium finishes like custom cabinetry, high-end appliances, and bifold patio doors drove the budget. Site access was also tight, increasing labor costs.
What no one else covers
The sticker price of an ADU often hides the true cost of site work and utilities. These are the budget items that can't be easily estimated from a floor plan. I've seen projects where the utility connections alone cost more than the entire framing package. Trenching is the big one. If your sewer connection is at the front of your house and you're building the ADU 100 feet back, you're paying for 100 feet of excavation, pipe, backfill, and compaction. If that trench has to cross a concrete driveway or mature tree roots, the cost balloons. Then there are the fees. Tapping into the city sewer main isn't free; in many cities, the 'sewer capacity charge' can be $5,000 to $10,000. Upgrading your electrical service is another common surprise. An older home with a 100-amp main panel often doesn't have the capacity for an all-electric ADU. Upgrading to a 200-amp service can cost $4,000 to $8,000 and may require coordination with the utility company, which adds time.
Soil condition is the other great unknown. California's geology is diverse. Building in the hills of Silver Lake in Los Angeles means dealing with steep slopes and potentially unstable soil, requiring deep caissons for the foundation instead of a simple slab. That's a $50,000 difference. In contrast, the expansive clay soils in other parts of the state require a post-tensioned foundation, which is more expensive than a standard slab. A soil report, which costs about $2,500, should be one of your first investments. It tells the structural engineer exactly what kind of foundation to design. Skipping it is like flying blind; you're gambling that the ground beneath your half-million-dollar investment is stable. These are the unglamorous, below-ground costs that determine whether your project pencils out.
Managing Your ADU Project Timeline
A realistic timeline for a new-construction ADU in California, from initial design to receiving the Certificate of Occupancy, is nine to fourteen months. Anyone who tells you it can be done in four months is selling you a fantasy. The timeline breaks down into distinct phases. Design and engineering will take one to two months. The permitting process, even with the 60-day shot clock, often takes two to three months from first submission to having an approved permit in hand, especially if corrections are required. Once construction starts, a typical 600-square-foot ADU will take five to eight months to build. That's assuming no major delays. A detached new build is a miniature house construction project. The schedule is subject to the same risks: weather, subcontractor availability, material shortages, and inspection delays. A failed framing inspection can set you back a week waiting for the inspector to return. If a specialty material like custom windows is delayed, the whole project can stall. A good general contractor will give you a detailed schedule using a tool like Microsoft Project or BuilderTrend, but even the best schedule is a forecast, not a promise. 10 weeks if nothing surprises you, 14 if the slab moves.
Budgeting for Overruns and Surprises
No construction project finishes exactly on budget. There are always surprises. The key is to plan for them. A contingency fund is a non-negotiable part of your project budget. This is money set aside specifically for unforeseen costs. How much should you set aside? We use a ten to fifteen percent contingency as a planning assumption; for comparison, HUD's Standard 203(k) loan rules require a reserve of at least 10 percent on homes 30 years or older. For a new-build ADU, a 10% contingency is a safe minimum. On a $300,000 project, that's $30,000. This fund covers things like discovering an old, abandoned septic tank during excavation, needing to upgrade the main water line, or dealing with unexpected price increases on materials. It's not a slush fund for upgrades. If you decide you want to switch from laminate countertops to marble mid-project, that's a change order, and it should be paid for with new money, not from your contingency. The contingency fund is your project's insurance policy against the unknown. If you're lucky and don't need it, you have a nice bonus at the end. But starting a project without it is asking for financial trouble.
California-Specific ADU Risks and How to Mitigate Them
Building in California means building for its unique environmental risks. Your design and budget must account for these from day one. The first is seismic activity. The entire state is in a seismic zone, and your ADU's foundation and framing must be engineered to withstand earthquakes. This means specific nailing patterns, shear walls, and foundation hold-downs that are all non-negotiable and will be checked at inspection. Second is wildfire risk. If your property is in a High Fire Hazard Severity Zone, you'll be required to use ignition-resistant materials, like fiber cement siding and tempered glass windows, and maintain defensible space around the unit. This adds cost and limits your design choices. For homeowners in coastal areas like San Diego's Normal Heights or anywhere with ocean air, salt corrosion is a real issue. Using galvanized hardware, stainless steel fasteners, and specifying corrosion-resistant finishes for exterior fixtures is critical for the longevity of the structure. Finally, in the Central Valley, extreme summer heat is a major design factor. Title 24, California's energy code, will dictate high insulation values, cool roof materials, and efficient HVAC systems to manage cooling loads. Ignoring these regional risks isn't an option; they are baked into the building code.
ADU For Sale: Project Checklist
- Feasibility: Confirm your local jurisdiction has opted into AB 1033. Check zoning, setbacks, and utility capacity.
- Team Assembly: Hire an architect/designer, a structural engineer, and a general contractor. For a sale, engage a surveyor and real estate attorney early.
- Design & Engineering: Develop full construction documents, including structural calculations and a site plan. Get a soil report.
- Financing: Secure a construction loan or have cash reserves to cover the entire build plus a 10-15% contingency.
- Permitting: Submit plans to the local building department and clear all plan check comments.
- Construction: Proceed through all phases from foundation to finishes, passing all required city inspections along the way.
- Certificate of Occupancy: Obtain the final sign-off from the building department.
- Condominium Process: Work with your attorney and surveyor to draft and record the condominium map and HOA documents.
- Sale: List the property with a qualified real estate agent. Be prepared to educate potential buyers and their lenders on this new type of property. You can find a pro to guide you through these final steps.
The Renology Take
The ability to sell an ADU is the single biggest shift in California property law in a generation. It fundamentally changes the math of building one. For years, the question was about rental ROI or housing a family member. Now, it's about manufacturing new real estate. The meta-pattern most people miss is that this isn't a simple flip. You are, in effect, becoming a small-scale property developer. The skills required are different. It’s not just about building a quality unit; it’s about navigating the legal framework to create a sellable asset. The highest risk isn't a construction delay; it's a title problem. Success means thinking like a developer from day one: front-loading the legal and survey work, understanding the target buyer, and building a product that a bank will actually finance. This is a powerful wealth-creation tool, but only for those who treat it with the seriousness of starting a new venture.
Sources & Methodology
See the Renology Methodology for how sources are reviewed, ranges are normalized, and planning-data limits are handled.
Cost ranges in this guide draw on the following named industry sources, public agency datasets, and Renology editorial research.
- California Assembly Bill 1033 (2023) (2023)
- California Assembly Bill 68 (2019) (2019)
- California Department of Housing and Community Development (HCD) ADU Handbook (2023)
- California Department of Industrial Relations, Prevailing Wage Determinations (2026)
- National Association of Home Builders (NAHB) (2025)
- California Building Standards Code (Title 24) (2022)
- Los Angeles Department of Building and Safety (LADBS) ADU Guidelines (2024)
- U.S. Census Bureau, Monthly Construction Spending (2026)
Frequently Asked Questions
How much does it cost to build an accessory dwelling unit for sale in California?
How long does it take to build and sell an ADU?
Do I need an architect to build an ADU in California?
What is AB 1033 and how does it affect my ADU?
Can I build the ADU myself to save money?
How does financing work for an ADU that will be sold?
What are the biggest hidden costs in an ADU project?
Do I have to provide parking for my ADU?
Ready to find a pro?
Tell us what you are planning and where. A Renology advisor can help you explore contractor matching.
Find a Pro- Free for homeowners
- Licensed, vetted local contractors
- No obligation to hire
Sources
- California Assembly Bill 1033 (2023)
- California Assembly Bill 68 (2019)
- California Department of Housing and Community Development (HCD) ADU Handbook
- California Department of Industrial Relations, Prevailing Wage Determinations
- National Association of Home Builders (NAHB)
- California Building Standards Code (Title 24)
- Los Angeles Department of Building and Safety (LADBS) ADU Guidelines
- U.S. Census Bureau, Monthly Construction Spending
Follow Renology on Google
Choose Renology as a preferred source and our guides show up more often in your Google results, including Top Stories and AI Overviews.