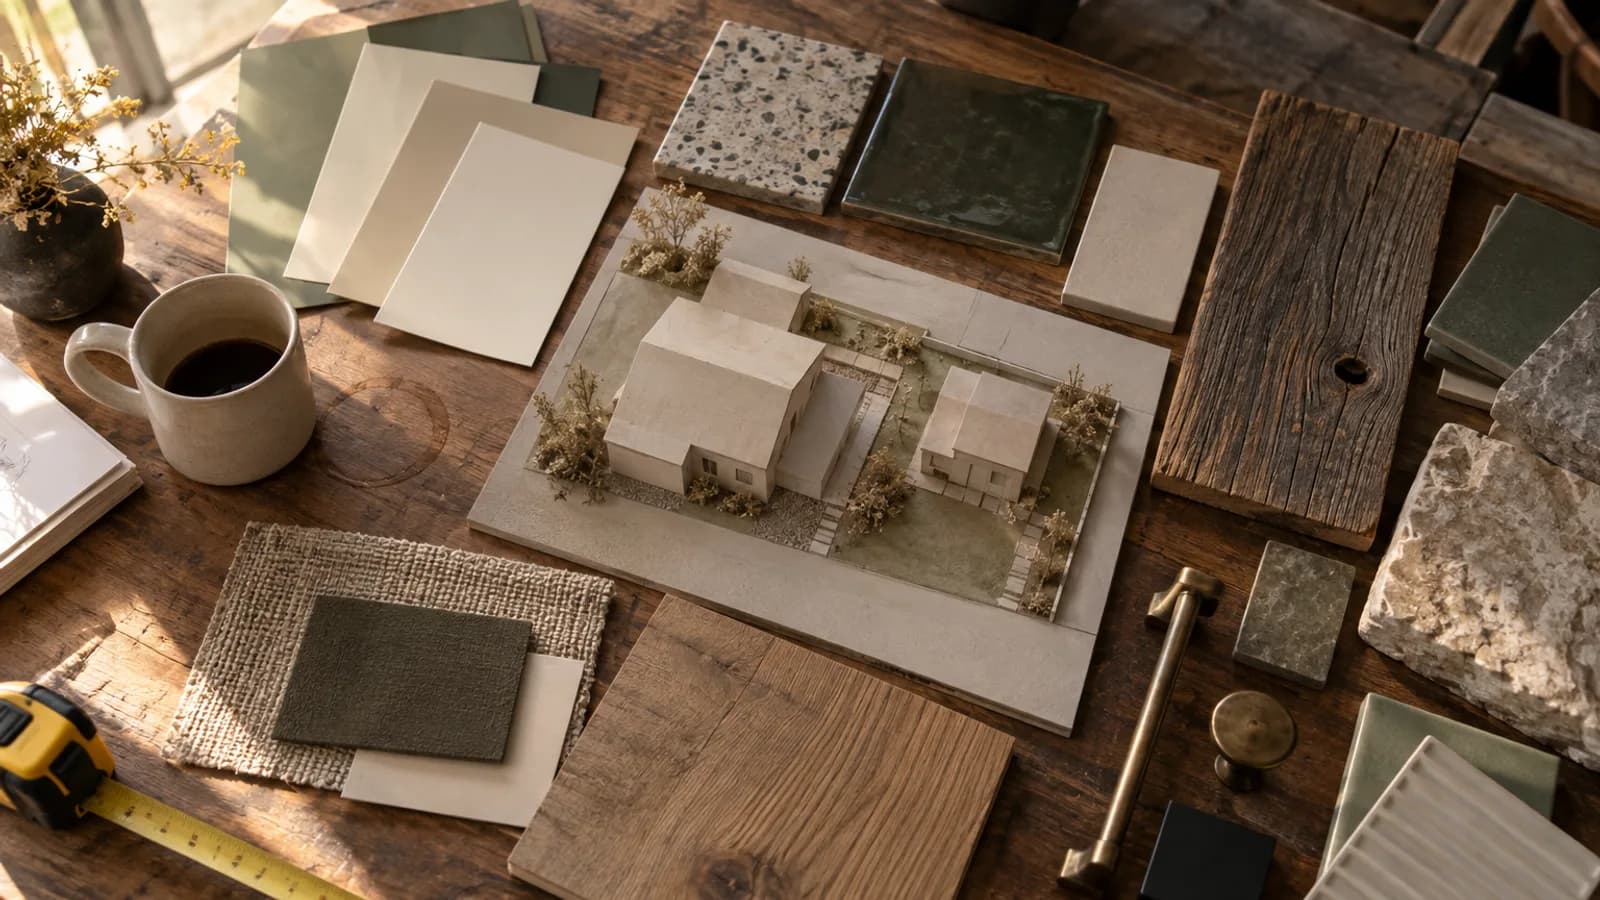
Building a detached accessory dwelling unit in California isn't like a weekend deck project. You're building a house. A small house, but a house nonetheless, with all the same rules for foundation, framing, and utilities. The state has made the zoning and permitting easier, but gravity and the building code don't grade on a curve. Get the load path wrong, and the structure fails. Get the utility tie-ins wrong, and you'll flood the yard or fail inspection. This is a real construction project that demands a real plan.
In a Nutshell
- Statewide Cost Range: A detached ADU in California typically costs between $180,000 and $500,000, depending on size, location, and level of finish. Site conditions are the biggest variable.
- Typical Timeline: Expect 12 to 18 months from initial design to receiving your Certificate of Occupancy. Permitting alone can take three to six months in some jurisdictions.
- Key Challenge: Utility connections. Trenching for sewer, water, and power from the primary residence is often the most underestimated cost and logistical hurdle.
- Biggest Mistake: Underestimating soft costs. Design, engineering, and permit fees can easily account for 15 to 20 percent of your total budget before you ever break ground.
- California Law Is on Your Side: Recent state laws like AB 68 and AB 970 have streamlined the approval process, mandating that local agencies act on ADU applications within 60 days and reducing owner-occupancy requirements.
How It Works: The 8-Step Build Plan
Building a detached ADU follows the same critical path as any new construction. Skipping a step or getting them out of order is the fastest way to blow your budget and timeline. Here is the sequence every successful project follows.
- Step 1: Feasibility and Zoning Check. Before you hire an architect, confirm you can legally build. Check your local city or county planning department's rules against your property survey. California state law allows an ADU of at least 800 square feet on any residential lot, but local rules on setbacks, height, and lot coverage still apply. Why: This step prevents you from spending thousands on designs for a project that was never viable. Watch out for: Easements or underground utilities that can restrict your buildable area.
- Step 2: Design and Engineering. Hire a qualified architect or designer to create a full set of construction documents. This isn't just a floor plan. It includes elevations, foundation plans, structural engineering calculations, and Title 24 energy compliance reports. This is where you lock in your scope of work. Why: A complete, engineered plan is required to pull a permit and get accurate bids from contractors. Watch out for: Scope creep after the design is locked. Changing a window location after engineering is done means re-engineering, which costs time and money.
- Step 3: Submit for Permits. Your completed plans are submitted to the local building department. The plan checker reviews everything for compliance with the California Building Code (CBC), local zoning ordinances, and public works requirements for things like sewer connections. In California, the state's 60-day shot clock means the agency must provide a full list of corrections or approve the permit within that timeframe. Why: You cannot legally begin construction without a stamped, approved set of plans and a posted permit card. Watch out for: Incomplete submissions. A missing soils report or structural calculation will get your application sent to the back of the line. You can use tools to get a sense of local timelines, but your specific project dictates the pace. Check our permit timeline tool for estimates.
- Step 4: Site Prep and Foundation. This is where the physical work begins. The site is cleared, graded, and trenched for utilities. The surveyor stakes out the foundation, and footings are dug and poured. The slab or raised foundation is then formed. This phase requires multiple inspections for footing depth, rebar placement, and underslab plumbing before any concrete is poured. Why: The foundation is the literal base for the entire project; it must be perfectly level, square, and tied into solid ground. Watch out for: Unforeseen soil conditions. Expansive clay soil in areas like the East Bay or poor drainage can require deeper, more expensive engineered footings.
- Step 5: Framing and Rough-In. The skeleton of the house goes up. Walls are framed, sheathed, and the roof structure is built. This is where the building takes its shape. Concurrently, plumbers, electricians, and HVAC technicians run pipes, wires, and ducts through the open walls. This is the "rough-in" phase, and it requires another round of inspections for framing, electrical, plumbing, and mechanical systems before any insulation or drywall can be installed. Why: The rough-in inspections ensure that the core systems of the house are safe and to code before they are concealed behind walls. Watch out for: A failed framing inspection. If a load path is incorrect or seismic hardware is missing, you'll be tearing open walls to fix it.
- Step 6: Exterior Finishes and Dry-In. Once the roof is on and sheathing is wrapped, windows and doors are installed. Siding and exterior trim are next. The goal is to make the structure watertight, or "dried-in," as quickly as possible to protect the interior framing from the elements. This is especially critical in coastal areas of San Diego or the rainy season in Northern California. Why: A dried-in structure allows interior work like insulation and drywall to begin without risk of water damage. Watch out for: Improper window flashing. This is a leading cause of water intrusion and rot in pre-2010 homes, and inspectors look at it very closely.
- Step 7: Interior Finishes. With the building secure, the focus moves inside. Insulation is installed and inspected. Drywall is hung, taped, and textured. Cabinets, flooring, tile, and countertops are installed. Plumbers and electricians return to install fixtures, outlets, and appliances (the "trim" phase). Finally, painters apply the final coats. Why: This is the longest phase of the build and where the ADU starts to feel like a home. Watch out for: Material lead times. Custom-ordered tile or windows can add months to your schedule if not planned for during the design phase.
- Step 8: Final Inspections and Occupancy. One last series of inspections is required from the building department to verify that every aspect of the project is complete and up to code. This includes everything from smoke detector placement to the grade of the soil around the foundation. Once you pass the final inspection, the city or county issues a Certificate of Occupancy. Why: The Certificate of Occupancy is the official document that makes it legal to live in the new dwelling. Watch out for: The final punch list. Small items missed by the contractor can hold up your final inspection, so a thorough walk-through is essential.
How Much a Detached ADU Costs in California
A new-construction detached accessory dwelling unit in California will typically cost between $350 and $650 per square foot, leading to an all-in project cost of $180,000 to $500,000 or more. The lower end of that range might apply to a very simple studio build on a flat lot with easy utility access, not a full one-bedroom unit in a high-cost coastal area. Costs vary significantly by region. A project in Bakersfield or Fresno will cost considerably less than an identical one in Palo Alto or Santa Monica, primarily due to labor rates and local fees.
Here’s a rough breakdown of expected cost ranges by region for a 600-square-foot detached ADU:

- Los Angeles County: $240,000 to $420,000
- San Francisco Bay Area: $300,000 to $550,000
- San Diego County: $220,000 to $400,000
- Sacramento / Central Valley: $180,000 to $320,000
Three representative projects from 2026, scoped similarly, reconstructed from Renology's Project of the Day network and used here in aggregate form:
- Basic ($180,000): A 400-square-foot studio ADU in Riverside County. Built from a stock plan with basic finishes, vinyl plank flooring, and laminate countertops. The lot was flat with a short, simple utility trench.
- Mid-range ($325,000): A 650-square-foot, one-bedroom ADU in the San Fernando Valley. Semi-custom design, stucco exterior, mid-grade appliances, and engineered hardwood floors. Required a new electrical subpanel and a 60-foot trench for sewer.
- Premium ($500,000): An 800-square-foot, two-bedroom ADU in San Jose. Custom architectural design, standing seam metal roof, high-end bifold doors, and luxury finishes. Site work was complicated by a slight slope, requiring a small retaining wall.
Statewide estimates for all-in project costs, including site work and fees. Source: Renology 2026 project data.
Why Is It So Expensive? A Cost Breakdown
Homeowners often get sticker shock when they see ADU price tags. It's because you are building a complete, independent home. It has its own foundation, its own walls, its own roof, and its own dedicated mechanical, electrical, and plumbing (MEP) systems. There are very few economies of scale. The cost for a plumber to connect a single toilet in an ADU is not much less than connecting three in a larger house, because the mobilization cost is the same.
A typical budget for a detached ADU breaks down like this:
- Soft Costs (15-20%): Architectural design, structural engineering, soils reports, survey, and permit fees.
- Site Work & Foundation (15-25%): Excavation, grading, utility trenching, and the concrete foundation. This is the biggest variable; a difficult site can push this to 30 percent of the budget.
- Structure / Shell (20-25%): Framing lumber, sheathing, roofing, windows, and siding.
- Interior Finishes (25-30%): Insulation, drywall, flooring, paint, cabinets, countertops, and tile.
- MEP Systems (15-20%): Plumbing, electrical, and HVAC, including fixtures and appliances.
Labor is the single largest component, often 50 to 60 percent of the total project cost. Skilled trade labor is expensive in California for a reason. According to the California Department of Industrial Relations prevailing wage data for Los Angeles County, a journey-level electrician or plumber commands a high hourly rate. You are paying for years of training, licensing, and insurance, which is what ensures your home is safe and built to last. For a deeper dive into the specifics of budgeting, explore our full guide to ADU construction.
What Can Go Wrong? (And How to Budget for It)
In construction, the unknowns live underground. The most common source of budget overruns in an ADU project is unforeseen site conditions. You might hit a layer of rock while trenching for the sewer line, discover an old, undocumented septic tank, or find that the soil is too unstable to support a standard foundation. A soils report can mitigate some of this risk, but you never truly know what's there until you start digging.
Permit delays are another major factor. While the state mandates a 60-day review period, that clock can reset every time the city requests a correction. A project in a historic overlay zone in Pasadena or a coastal commission zone in Malibu will face extra layers of review that can add months to the timeline. Material price volatility is a constant risk as well. A sudden spike in lumber or copper prices can impact your budget if your contractor hasn't locked in pricing with their suppliers.
This is why a contingency fund is not optional. The National Association of Home Builders recommends a ten to fifteen percent contingency on renovations in homes over thirty years old. For new construction like an ADU, a 10 percent contingency is the absolute minimum. This isn't a slush fund; it's a dedicated budget line item to deal with the inevitable surprises that come with a complex project. If you don't need it, you have a bonus at the end. If you do need it, it will save your project from stalling out.
Three Ways to Save Money (Without Cutting Corners)
Reducing the cost of an ADU is possible, but it has to be done intelligently. Cutting corners on structure or waterproofing is the definition of false economy. You'll pay for it ten times over in repairs. Here are three ways to save that won't compromise the integrity of the building.
- Choose a Pre-Approved or Stock Plan. Many jurisdictions, including the City of Los Angeles (LADBS) and San Diego, now offer pre-approved ADU plans. Using one of these can save you thousands in architectural fees and significantly speed up the permitting process. Even if your city doesn't have a program, buying a stock plan online and having a local engineer adapt it for your site is cheaper than a fully custom design.
- Simplify the Form. Complexity costs money. A simple rectangular footprint with a standard gable roof is dramatically cheaper to frame, roof, and finish than a complex shape with multiple corners and roof valleys. Every corner adds labor and material for framing, siding, and foundation forming. Keep the design clean and efficient. This also applies to finishes. Opt for standard-size windows and doors.
- Consolidate Plumbing. Design the ADU so the kitchen and bathroom share a common "wet wall." This minimizes the length of expensive plumbing runs for both supply and drain lines. The shorter the distance your plumber has to run copper and ABS pipe, the less you'll pay in both labor and materials. It also simplifies the rough-in and inspection process.
What no one else covers
The single most misunderstood and under-budgeted part of a detached ADU project is the utility trench. Everyone focuses on the building itself, but the 100-foot journey from your main house to the ADU is where schedules and budgets get destroyed. It's not just digging a ditch. That trench has to contain a sewer line, a water line, a gas line (optional), and electrical conduit, all at specific, code-mandated depths and separations. The sewer line is king; it must maintain a constant slope (typically a quarter-inch per foot) from the ADU to the tie-in point at the main house. This gravity-fed requirement dictates the starting elevation of your entire ADU.
If your main sewer lateral is shallow, your ADU might need to sit higher off the ground, or you might need to install an expensive sewage ejector pump. The cost to trench also varies wildly. Digging through soft dirt is one price. Saw-cutting through a 6-inch thick concrete driveway, excavating, and then repouring the concrete is ten times the cost. In many parts of California with expansive clay soils, like in neighborhoods around San Jose or parts of Orange County, the soil itself requires special handling. You also have to locate existing underground utilities before you dig. Hitting a gas line is a catastrophe. Hitting your own irrigation lines is just an expensive headache.
Before you fall in love with a floor plan, have a contractor or plumber assess your utility path. They can use a camera to inspect the condition and depth of your main sewer lateral. This information is more critical to your initial budget than almost any other factor. A project with a simple, short, all-dirt utility run is fundamentally different from one that requires trenching across 80 feet of reinforced concrete and a new sewer cleanout. Getting this part right, and budgeting for it honestly, is the key to a successful project.
Checklist: Your ADU Project from Start to Finish
- Phase 1: Research & Planning
- [ ] Verify zoning and setback rules with your local planning department.
- [ ] Order a survey of your property.
- [ ] Develop a realistic budget, including a 10-15% contingency.
- [ ] Interview at least three architects or designers.
- [ ] Interview at least three qualified general contractors. You can find a vetted pro through our matching service.
- Phase 2: Design & Permitting
- [ ] Finalize design and material selections (scope-lock date).
- [ ] Obtain structural engineering plans.
- [ ] Obtain Title 24 energy report.
- [ ] Submit complete plan set to the building department.
- [ ] Respond to any plan check corrections promptly.
- [ ] Receive approved permit and post it at the job site.
- Phase 3: Construction
- [ ] Site prep, grading, and utility trenching.
- [ ] Pass inspection for foundation footings and underslab plumbing.
- [ ] Pour foundation.
- [ ] Frame walls and roof.
- [ ] Pass inspections for framing, rough electrical, rough plumbing, and mechanical.
- [ ] Install windows, doors, and roofing (dry-in).
- [ ] Install insulation and pass insulation inspection.
- [ ] Hang and finish drywall.
- [ ] Install all interior and exterior finishes.
- Phase 4: Completion
- [ ] Install appliances and fixtures.
- [ ] Complete final site grading and landscaping.
- [ ] Schedule and pass all final inspections.
- [ ] Receive Certificate of Occupancy from the city/county.
- [ ] Complete final punch list walk-through with your contractor.
The Renology Take
3 ADU builders, editor-screened. 4 questions.
See my 3 matchesThe single biggest pattern homeowners miss is that an ADU is not a product you buy; it's a project you manage. State laws have made it easier to get a permit, but they haven't amended the laws of physics or the building code. A detached ADU is a small house subject to the same requirements for seismic safety, fire separation, and energy efficiency as the main home on the lot. There are no shortcuts. The contractors who promise them are the ones who disappear mid-project. Success comes from treating it with the seriousness it deserves: a detailed plan, a vetted professional team, a realistic budget with a contingency, and the patience to see a complex construction project through to the finish line. Get that right, and you've added a valuable, functional asset to your property.
What's the difference between a detached ADU and a guest house?
Functionally, a detached ADU is a modern guest house, but with a key legal distinction: it must contain a full kitchen. A guest house or pool house might have a bathroom and sleeping area, but the inclusion of permanent cooking facilities (a stove, oven, and sink) is what legally defines it as a dwelling unit. This is why ADUs are sometimes called "granny flats" or "in-law units."
This distinction is critical for permitting and use. Because it's a full dwelling, it must meet higher standards for safety, energy, and accessibility. California law, specifically the state's ADU handbook, clarifies these requirements. The benefit is that, unlike a guest house, a legally permitted ADU can be rented out to a third-party tenant in most jurisdictions, providing a source of income for the homeowner. It is also assessed for property taxes as a separate unit, though the increase is based on the value of the new construction, not a reassessment of your entire property.
Can I build an ADU myself (DIY)?
Legally, as the property owner, you can act as your own general contractor (an owner-builder) and even perform the work yourself. However, this path is filled with risk unless you have significant construction experience. You are responsible for pulling permits, scheduling inspections, and ensuring all work meets the California Building Code. Any work you hire subcontractors for requires you to verify their license and insurance.
The reality is that building a detached ADU is too complex for most DIYers. The structural, electrical, and plumbing systems must be installed correctly to pass inspection and be safe. A mistake in waterproofing the foundation or flashing a window can lead to catastrophic damage down the line. For most homeowners, hiring a licensed and insured general contractor is the safer and ultimately more cost-effective choice. It protects you from liability and ensures the project is built to professional standards.
How will an ADU affect my property taxes?
Building a detached ADU will increase your property taxes, but it will not trigger a reassessment of your entire property's value under Proposition 13. Instead, your county assessor will perform a "blended assessment." This means your existing home and lot retain their original assessed value, and only the newly constructed ADU is assessed at its current market value upon completion.
For example, if your home has an assessed value of $400,000 and you build an ADU that cost $300,000, your new total assessed value would be roughly $700,000. Your new property tax bill would be calculated based on this higher figure. The annual increase is typically about one to 1.25 percent of the value of the new construction. While it is an added expense, it's often more than offset by the rental income the ADU can generate or the value it adds to your property.
Are prefab or modular ADUs cheaper in California?
Prefabricated ADUs can be cheaper, but it's not a guarantee. The advertised price for a prefab unit is often just for the structure itself (the "box"), delivered to your site. This price typically does not include the significant "site-specific" costs, which you must pay for separately. These include design and engineering for the foundation, permit fees, the foundation itself, utility trenching and connection, transportation, and craning the unit into place.
When you add all these site costs, a prefab ADU often ends up costing about the same as a traditional stick-built unit, or perhaps 10 to 15 percent less in some cases. The main advantage of prefab is often a faster construction timeline, since the unit is built in a factory while your foundation is being prepared. This can reduce on-site disruption from months to weeks. Always get a fully itemized bid that includes all site work before assuming prefab is the more affordable option.
What are the main California state laws for ADUs?
California has passed several landmark bills to encourage ADU construction and address the housing crisis. The most important is AB 68 (2019), which streamlined approvals, reduced setback requirements to four feet, and prohibited local agencies from imposing restrictive standards like excessive parking requirements. AB 970 (2020) established the 60-day "shot clock" for permit application review.
More recently, SB 9 (2021) allows homeowners to split a single-family lot and potentially build up to four units. And AB 1033 (2024) gives local agencies the option to allow ADUs to be sold separately from the primary residence, similar to a condominium. These state laws override more restrictive local ordinances, creating a more favorable environment for homeowners to build across California. Always check the California Department of Housing and Community Development (HCD) ADU Handbook for the latest official guidance.
How long does it take to get ADU permits in California?
While state law requires local agencies to approve or deny an ADU permit application within 60 days, the total time to get a permit is often longer. The 60-day clock applies to a *complete* application. If your submitted plans are missing information or have code violations, the city will issue corrections, and the clock may reset once you resubmit. The process can take anywhere from three to six months in practice.
The initial plan creation with your architect can take one to two months. After submission, the first round of comments from the city might take 45 to 60 days. Addressing those comments and resubmitting can take another few weeks. Some cities, like Los Angeles and San Jose, have made significant efforts to expedite ADU permits, while others can be slower. The complexity of your project and the quality of your initial submission are the biggest factors in how quickly you get your permit in hand.
Do I need a separate address and utility meters for my ADU?
A separate address for the ADU is typically assigned by the city or county during the permitting process and is required for mail and emergency services. However, separate utility meters are often not required by law, though they are highly recommended if you plan to have a long-term renter. Tapping into the main house's water, gas, and electrical systems is usually allowed.
Without separate meters, you'll have to prorate the utility bills between the main house and the ADU, which can lead to disputes with tenants. Installing submeters can track usage, but the bill remains in the homeowner's name. Establishing a completely separate service with its own meters from the utility company (e.g., PG&E, SoCal Edison) provides the cleanest separation but involves significant extra cost for connection fees and potentially a new electrical panel or gas line from the street. Many homeowners opt to include utilities in the rent to avoid the complexity.
What are the biggest challenges for ADUs in different California regions?
While state law is uniform, regional challenges vary. In coastal zones like Santa Cruz or parts of Orange County, you may face extra review from the California Coastal Commission, adding time and complexity. In high-risk fire zones (WUI areas) in the Sierra foothills or inland San Diego County, you'll have strict requirements for ignition-resistant materials and defensible space, adding cost.
In dense urban areas like San Francisco or Oakland, lots are often small and sloped, making foundation work and construction access a major logistical and financial challenge. In the Central Valley, the primary design challenge is extreme summer heat, requiring solid HVAC systems and excellent insulation to meet Title 24 energy standards efficiently. And across major fault lines in both Northern and Southern California, seismic engineering requirements are stringent and non-negotiable, impacting foundation and framing design.
Sources & Methodology
Renology reviews public permit and labor signals, supplier pricing, remodeler quote patterns, comparable projects, the Renology Cost Index, and the Renology Methodology. Cost references are planning ranges for local ADU projects, not fixed bids.
Frequently Asked Questions
What's the difference between a detached ADU and a guest house?
Can I build an ADU myself (DIY)?
How will an ADU affect my property taxes?
Are prefab or modular ADUs cheaper in California?
What are the main California state laws for ADUs?
How long does it take to get ADU permits in California?
Do I need a separate address and utility meters for my ADU?
What are the biggest challenges for ADUs in different California regions?
Get 3 ADU bids in 48 hours.
Our editors already vetted ADU builders. Answer 4 questions and we send 3 written bids inside 48 hours, with the real price for your scope, not their inflated first-call number.
- Free, no commission
- Pre-screened locally
- Bids inside 48 hours
Takes about 60 seconds. We'll text you when bids arrive.
Sources
- California Department of Housing and Community Development (HCD) ADU Handbook
- California Legislative Information: AB 68, AB 970, SB 9, AB 1033
- National Association of Home Builders (NAHB)
- California Building Standards Code (Title 24)
- California Department of Industrial Relations, Prevailing Wage Determinations
- Los Angeles Department of Building and Safety (LADBS) Pre-Approved ADU Plans
- U.S. Census Bureau, Annual Construction Spending
- Renology Project of the Day Network Data