Planning a roof replacement in Seattle? A full project typically runs $14,000 to $22,000 in 2026. Basic re-roofing starts near $8,400, while complex architectural work with premium materials can climb past $40,000. This is what your budget actually covers, what drives the price, and how to find a contractor who understands Seattle’s relentless weather.
The Honest 2026 Price for Roofing in Seattle
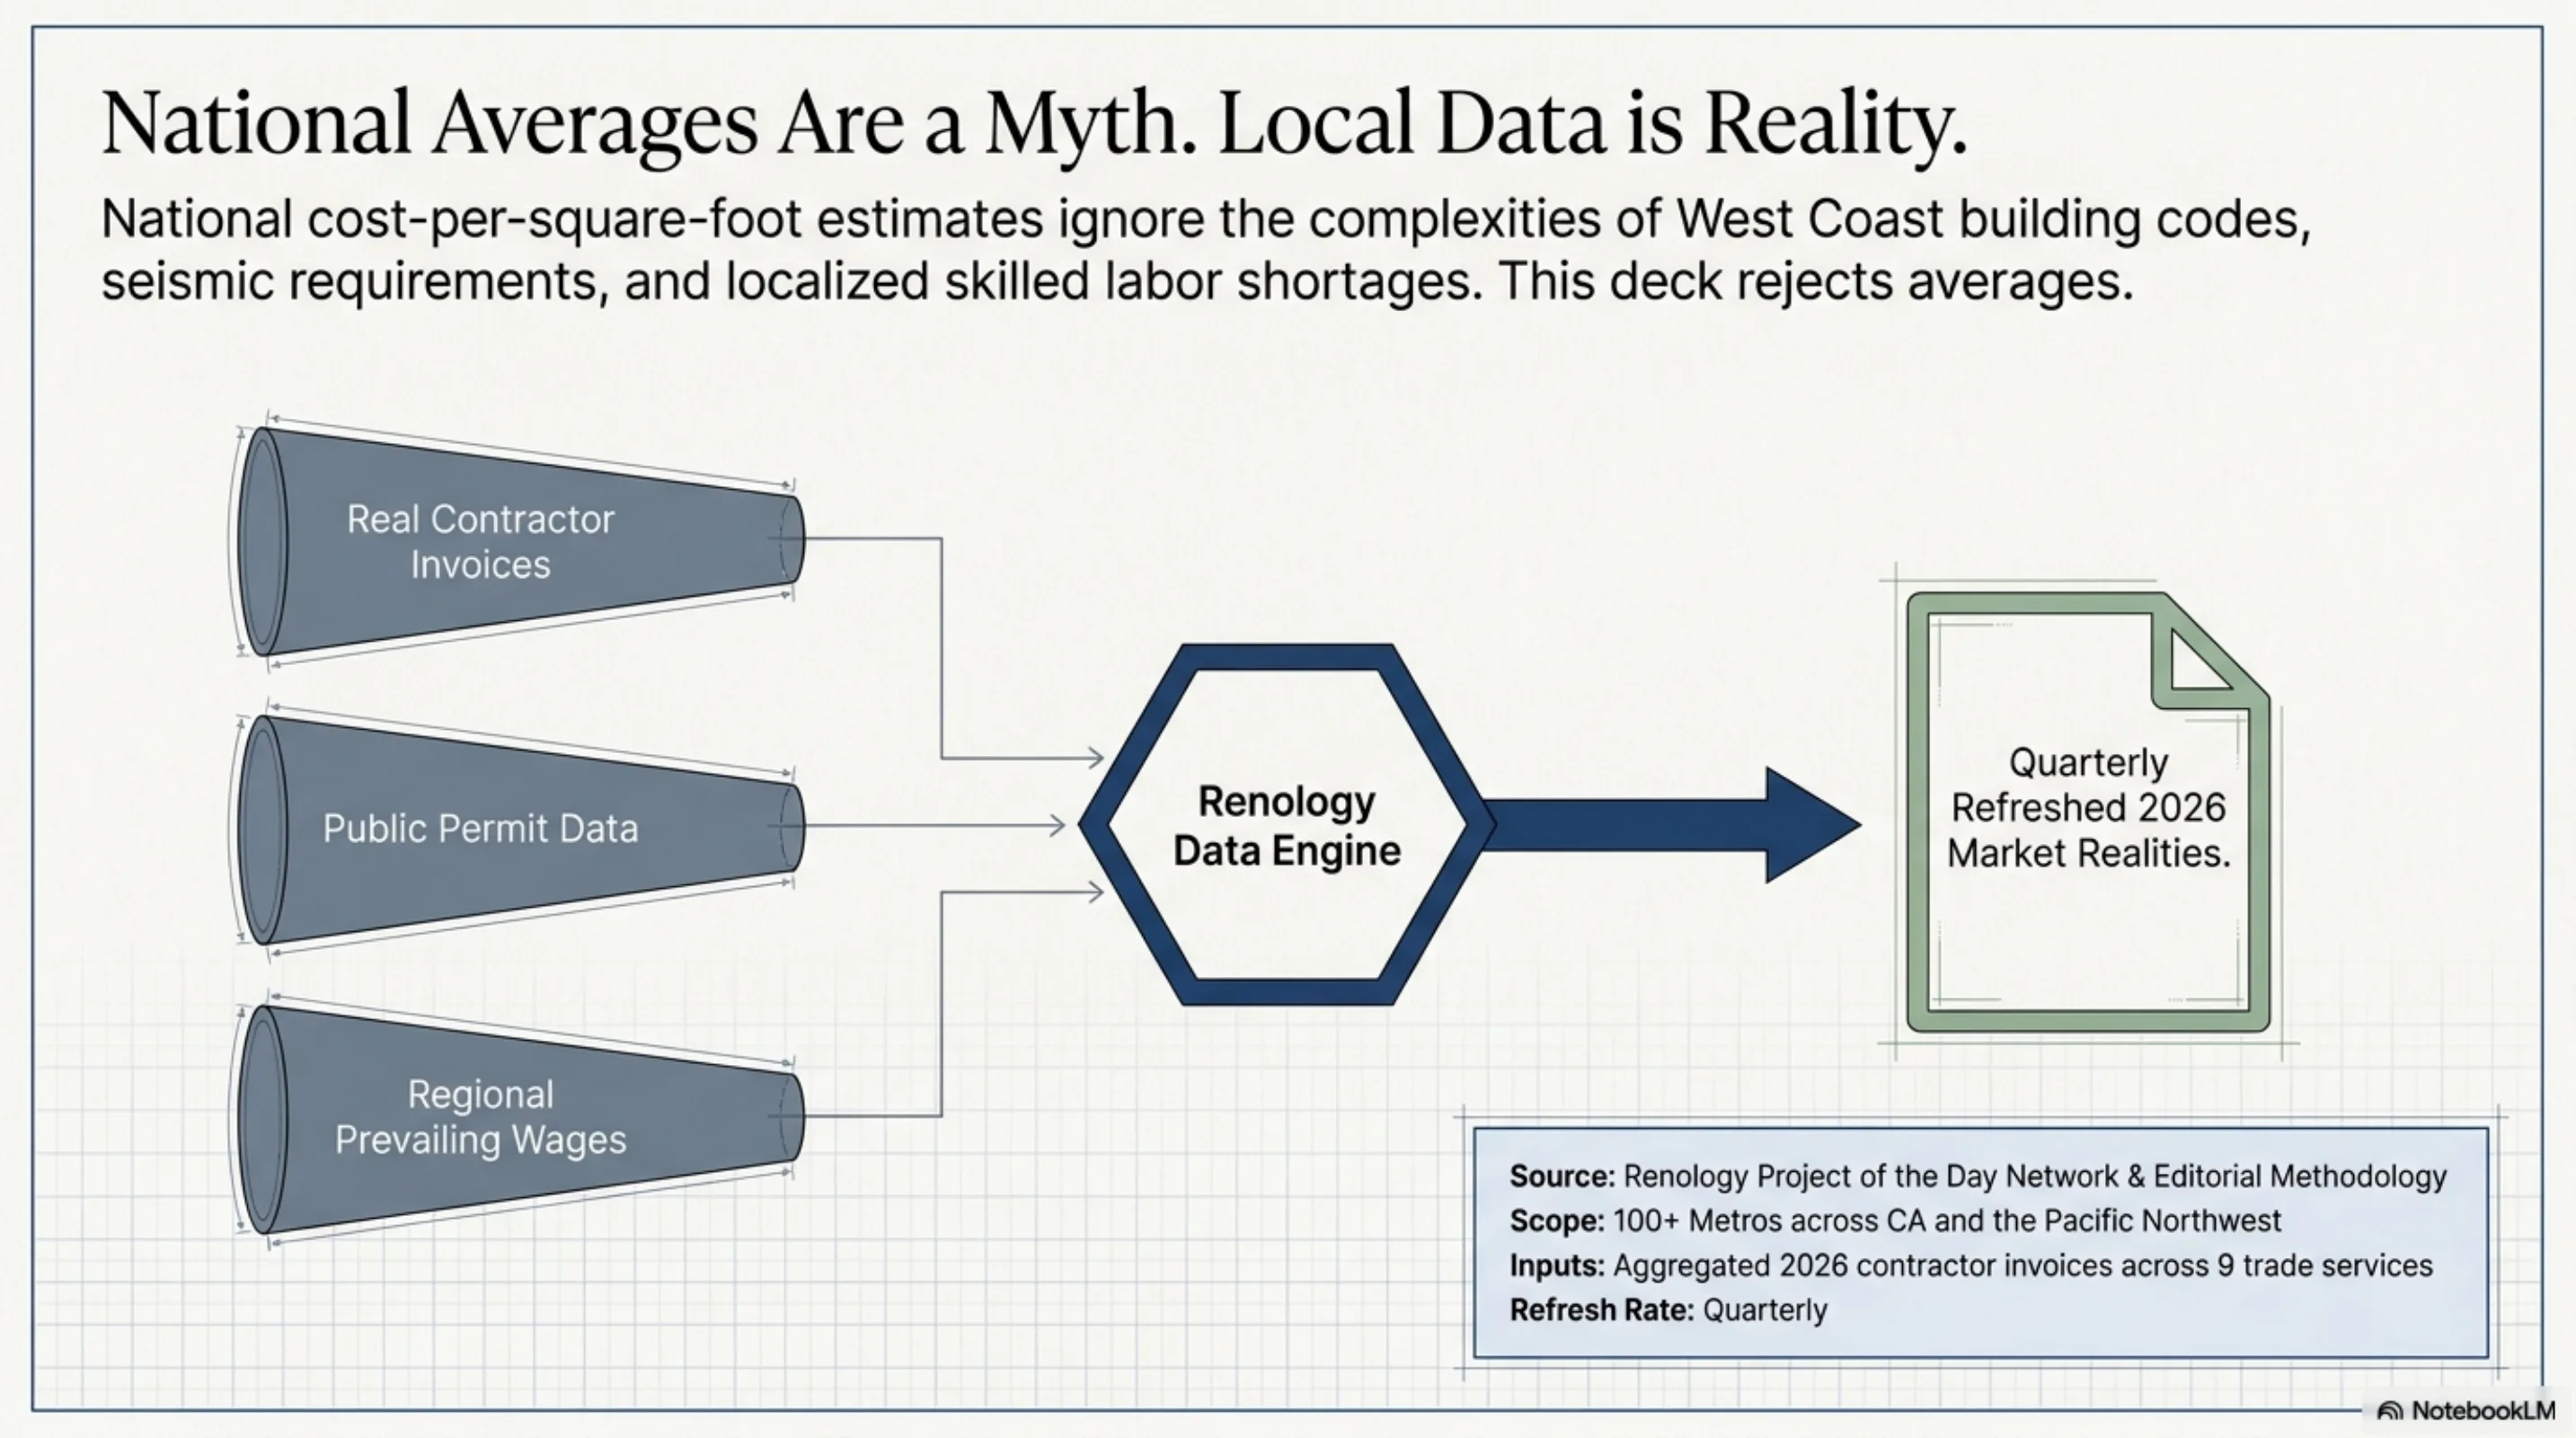
Let's get the numbers out of the way first. Replacing a roof in the Seattle metro is not a minor expense, and national cost estimators often miss the mark by a wide margin. Our climate, the age of our housing stock, and high demand for qualified labor create a unique pricing environment. Here at Renology, we track real contractor invoices, and for 2026, the data points to a clear three-tiered market for a standard 2,000 square-foot home.
The median project cost for a full tear-off and replacement with architectural asphalt shingles lands squarely between $14,000 and $22,000. This figure represents the most common scenario: a homeowner replacing an aging roof with a modern, code-compliant system designed to last another 25 to 30 years. Simpler projects, like an overlay on a low-pitch roof without significant repairs, can start as low as $8,400. Conversely, a steep, complex roof on a historic home requiring structural repairs and premium materials like standing-seam metal or composite slate can easily exceed $40,000.
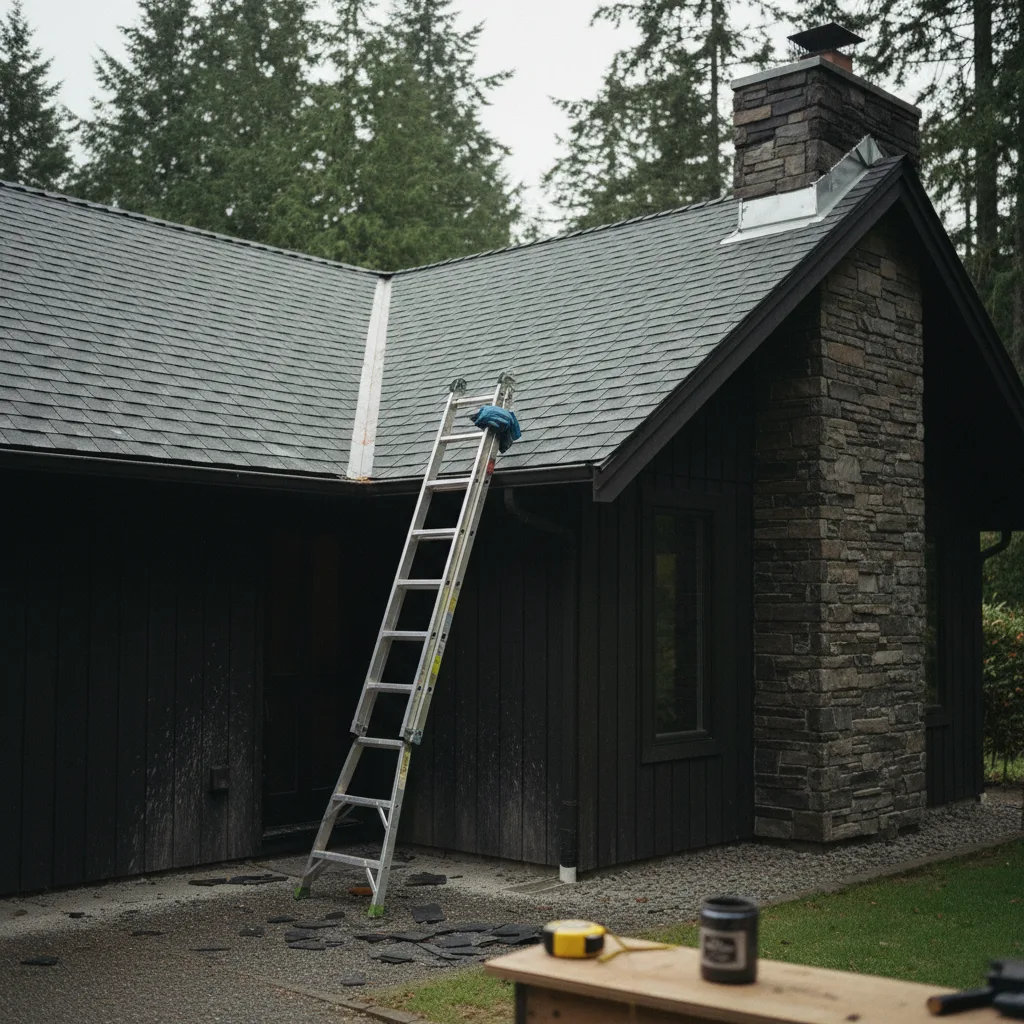
The key is to understand that you are not just buying shingles. You are investing in a complete roofing system: decking, underlayment, flashing, ventilation, and the shingles themselves. In a place with 38 inches of annual rain, every component of that system matters. Cutting corners on one part compromises the entire assembly.
What Drives Roofing Costs in Seattle
See what a roofing project actually costs in your Seattle zip.
Take 4 questions →The final invoice for a Seattle roofing project is a composite of several key factors. While materials get most of the attention, labor and site-specific challenges often have a greater impact on the bottom line. Understanding these drivers is the first step to building a realistic budget.
Labor and Crew Size
Skilled labor is the single largest component of any roofing bill in King County, often accounting for 50 to 60 percent of the total cost. The region’s construction boom and high cost of living mean that experienced, insured, and licensed roofing crews command a premium. The complexity of the job dictates the crew size and duration. A simple single-story gable roof might be completed by a crew of four in three days. A multi-gabled, two-story home with numerous valleys and dormers could require a larger crew for a full week, significantly increasing labor costs.
Material Selection: Beyond the Shingle
The material you choose is a major cost variable. Architectural asphalt shingles, the most common choice, offer the best balance of cost, durability, and aesthetics for most Seattle homes. However, the options extend far beyond this standard.
- Architectural Asphalt Shingles: The workhorse of the industry. Expect a 25 to 30 year lifespan. They perform well in our wet climate, provided the underlying system is sound.
- Standing-Seam Metal: A significant price jump, but offers a 50+ year lifespan and superior performance in shedding water and moss. It's an increasingly popular choice on modern and Northwest Contemporary homes.
- Composite Slate or Shake: Mimics the look of natural materials without the maintenance headache or weight. This is a premium choice, often costing two to three times as much as asphalt shingles.
Beyond the primary material, the quality of the underlayment is critical. In the Pacific Northwest, a high-quality synthetic, water-resistant underlayment is non-negotiable. It is your roof's last line of defense if wind-driven rain gets past the shingles.
Regional and Site-Specific Factors
Every roof has its own personality and challenges. A roofer's bid will always account for the unique conditions of your property.
- Roof Pitch and Complexity: A steep roof (anything over a 6/12 pitch) requires more safety equipment, slower work, and higher labor costs. Complex roofs with multiple valleys, hips, and dormers require more detailed cutting and flashing work.
- Accessibility: Can a truck get close to the house? Is the property on a steep hill? Limited access for material delivery and debris removal adds time and labor.
- Existing Layers and Decking Condition: Building code allows for a maximum of two layers of shingles. If you have two already, a full tear-off is mandatory. Once the old roof is off, the contractor will inspect the plywood or OSB decking underneath. Any soft, delaminated, or rotted sections must be replaced at a per-sheet cost, which can be an unexpected but necessary expense.
Pro tip
Always budget a 10 to 15 percent contingency fund. The most common surprise cost in a Seattle re-roof is discovering rotted roof decking or fascia boards after the tear-off. You won't know the extent of the damage until the old roof is gone.
Seattle Roofing by Tier: 3 Real Project Examples
To make the numbers more tangible, we analyzed recent invoices from the Renology network to model three common project scopes. These examples assume a typical 2,000 square-foot, two-story home with a moderately complex roof. Costs reflect 2026 pricing for licensed and insured contractors in the Seattle metro area.
| Tier | Scope of Work | Cost Range | Timeline |
|---|---|---|---|
| Cosmetic / Refresh | Tear-off of a single layer of shingles from a simple, low-pitch roof. Minimal to no decking repair needed. Replacement with standard architectural asphalt shingles. Replacement of basic pipe flashings. | $8,400, $14,000 | 3-5 days (active construction) |
| Standard / Mid-Range | Full tear-off of one or two layers of old shingles. Replacement of up to 5 sheets of rotted plywood decking. Installation of high-performance synthetic underlayment, ice and water shield in valleys, and new metal drip edge. New architectural asphalt shingles and ridge cap. Replacement of all vents and flashings. | $14,000, $22,000 | 5-8 days (active construction) |
| Premium / Custom | Full tear-off from a complex or steep-pitch roof. Significant decking or fascia board replacement. Upgraded ventilation system (e.g., adding ridge and soffit vents). Installation of a premium material like standing-seam metal or composite slate. Custom flashing for chimneys or skylights. | $26,000, $40,000+ | 1-3 weeks (active construction) |
In Seattle, a new roof isn't just a shield against the rain; it's an active water management and ventilation system for your entire home.
Permits and Local Code in Seattle
Navigating the permitting process is a critical step that your contractor should handle, but you need to know what is involved. In Seattle, the governing body is the Seattle Department of Construction and Inspections (SDCI). Their regulations are designed to ensure safety, structural integrity, and energy efficiency, all of which are particularly relevant to our wet, temperate climate.
When is a Permit Required?
A permit is generally not required for a simple re-shingle project if you are just replacing the existing roof covering. However, the moment the scope expands, so does the need for SDCI oversight. You will need a permit if your project involves:
- Structural alterations: This includes replacing any of the roof rafters or trusses.
- Replacing the sheathing: If more than a certain percentage of the roof decking (plywood or OSB) needs to be replaced, the SDCI considers it a structural repair and requires a permit. The threshold is typically around one-third of the total roof area.
- Changing the roofline: Adding dormers, changing the pitch, or any other modification to the roof's shape requires a full building permit.
The Seattle Energy Code
Even on projects that do not require a structural permit, your contractor must adhere to the Seattle Energy Code. For roofing, this primarily concerns attic ventilation. A properly ventilated attic is crucial in our climate to prevent moisture buildup and ice dams in the winter, and to reduce cooling costs in the summer. During a re-roof, a contractor may be required to add or improve vents to bring the home up to current code, which can add to the project cost but pays dividends in the long-term health of the structure.
Editor's note
The infamous "Seattle Process" can apply even to construction permits. While a simple roofing permit is straightforward, any project involving structural changes can see review times stretch. Ensure your contractor has a dedicated permit coordinator or extensive experience with the SDCI plan review system.
The Seattle Neighborhoods Where Roofing Costs Diverge
While the city-wide averages provide a good baseline, costs can shift based on the specific neighborhood's housing stock, topography, and lot constraints. A roof is a roof, but replacing one in Queen Anne is a different logistical puzzle than in a flatter, more spacious area.
Queen Anne and Capitol Hill
These neighborhoods are characterized by older, often historic homes built on steep hills. This presents a double challenge for roofers. First, the homes themselves often have very steep pitches, multiple gables, and complex rooflines that require more time and safety precautions. Second, the lots are tight and the streets are narrow. This makes material delivery, staging, and debris removal more difficult and labor-intensive. A crane or lift might be needed to get materials to the roof, adding a significant line item to the budget. Expect bids for projects in these areas to come in 10 to 20 percent higher than the city average due to these access and complexity factors.
Ballard and Wallingford
In my last walkthrough in Ballard, I saw the classic neighborhood dynamic at play. You have 1920s bungalows sitting next to modern, three-story townhomes. For the bungalows, the primary challenge is often age. It is almost a guarantee that a roofer will find multiple layers of old shingles and extensive decking rot. For the newer townhomes, the challenge is proximity. With zero-lot-line construction, access can be extremely limited, and contractors must take extra care to protect neighboring properties. This can slow down the work and increase labor costs for setup and cleanup.
Timeline: Realistic Week-by-Week Expectations
The "one week" timeline you might hear from a contractor refers only to the active construction phase. The full process, from your first call to the final nail, is much longer. A well-managed project follows a predictable path.
Weeks 1-2: Vetting and Bidding
This is your research phase. You will contact at least three reputable contractors, schedule site visits, and wait for their detailed bids. A thorough bid takes time to prepare, so do not rush this step. Use this period to check licenses, insurance, and references.
Weeks 3-4: Contract and Scheduling
Once you select a contractor, you will review and sign the contract. This document should detail the scope of work, materials, payment schedule, and warranty. After signing, your contractor will order materials and place your project on their schedule. In the busy summer months, there may be a four to six week lead time before they can start.
Week 5: The Project Begins (Active Construction)
- Day 1: Site Prep and Tear-Off. A dumpster arrives, and the crew protects your landscaping. They then begin the loud, messy process of tearing off the old roofing material.
- Day 2-3: Inspection and Repair. With the roof deck exposed, the crew inspects for damage. This is when any rotted sheathing or fascia boards are replaced.
- Day 4-6: System Installation. The new system is built from the deck up: drip edge, underlayment, flashing around vents and chimneys, and finally, the new shingles or metal panels.
- Day 7: Ridge Cap, Cleanup, and Final Inspection. The final components are installed, and the crew performs a meticulous cleanup of your property. You will do a final walkthrough with the project manager to ensure everything is to your satisfaction.
Important
Weather is the ultimate variable. A multi-day stretch of rain can pause a project mid-stream. Good contractors watch the forecast closely and will only tear off what they can make watertight in the same day.
How to Vet a Seattle Contractor
Choosing the right contractor is the most important decision you will make. A great crew can make a complex project feel smooth, while a poor one can turn it into a nightmare. A professional Seattle roofer will be able to speak fluently about managing moisture and ventilation specific to our climate.
Key Questions to Ask Every Contractor
- Are you licensed with Washington State L&I, bonded, and insured? Ask for their number and verify it online.
- Will you be using subcontractors or your own employees?
- What specific brand and type of underlayment do you recommend for the Seattle climate, and why?
- How do you handle ventilation? Will you be assessing my current attic ventilation and recommending improvements?
- What is your policy for handling unexpected wood rot or structural repairs? How are those costs calculated?
- What does your workmanship warranty cover, and for how long?
Red Flags to Watch For
- High-pressure sales tactics. A good contractor provides a detailed bid and gives you time to consider it. Beware of "today only" discounts.
- A vague or non-itemized bid. The proposal should clearly list the materials to be used, the scope of work, and the cost for potential extras like plywood replacement.
- Requesting a large up-front deposit. A small deposit to secure a spot on the schedule is normal (10 percent), but you should not pay the bulk of the cost until work is underway or complete.
- The lowest bid by a large margin. An unusually low bid is often a sign that the contractor has missed something, is using substandard materials, or is not properly insured.
Renology Take
After analyzing hundreds of roofing projects, the pattern is clear. Homeowners spend a lot of time comparing shingle warranties, a 30-year versus a 50-year product, for example. But in the Pacific Northwest, the shingles are almost never the first point of failure. The real vulnerability is in the system beneath them. A poorly installed flashing around a chimney, inadequate attic ventilation that promotes moisture buildup, or cheap underlayment will cause a catastrophic leak long before the shingle itself wears out. The most critical investment you make is not in the material, but in the skill of the crew that understands how to build a complete, integrated system designed to manage the constant assault of Seattle's rain. Focus your vetting process there, and your roof will perform for decades.
Sources & Methodology
These cost ranges are reconstructed from publicly available labor and permit data, the latest Remodeling Magazine cost-vs-value report, and Renology's own Project of the Day network, a rolling sample of real homeowner invoices we collect from Seattle-area contractors. Last refreshed April 2026.
- Remodeling Magazine, 2026 Cost vs. Value Report (Pacific Region)
- Seattle Department of Construction and Inspections (SDCI) Permit Fee Schedule, 2026
- Washington State Department of Labor & Industries (L&I), Prevailing Wage Data for King County, 2026
- National Association of Home Builders (NAHB) Housing Market Index, Q1 2026
- Master Builders Association of King and Snohomish Counties, 2026 Market Analysis
- Renology Project of the Day Network, aggregated 2026 contractor invoices in Seattle
- U.S. Census Bureau, Building Permits Survey, Seattle-Tacoma-Bellevue, WA MSA
Methodology
How Renology estimates roofing costs in Seattle.
Renology treats this page as a planning benchmark for Seattle, Washington, not a final quote. We compare published local guide data, contractor scope patterns, permit-sensitive work, climate or site constraints, and finish-level assumptions.
Cost range
$14,000-22,000
Timeline
1-2 weeks
Source type
Editorial dataset
Local factor: Pacific Northwest cool-wet (Köppen Csb): 38 inches annual rain, mild summers, frost-free winters near sea level.
Use these numbers to shape a scope and spot missing line items. Confirm permits, structural work, electrical, plumbing, gas, waterproofing, drainage, and code-sensitive details with the local building department and a licensed professional.
Compare against the full Renology Cost IndexSeattle · pre-screened
Get 3 Seattle roof bids in 48 hours.
Our editors already vetted Seattle roofers. Answer 4 questions and we send 3 written bids inside 48 hours, with the real price for your scope, not their inflated first-call number.
- Free, no commission
- Pre-screened locally
- Bids inside 48 hours
Takes about 60 seconds. We'll text you when bids arrive.